
To insert pictures in PowerPoint as individual slides, use the Photo Album feature, go to the Insert tab >> Photo Album >> New Photo Album, and then select the photos that you want to add as individual slides. Choose the Fit to Slide option and then click Create, and selected photos will be added as individual slides to your presentation.
This process may look long, but in practicality, a few clicks will get the job done. If you want to learn the step-by-step process of adding pictures in PowerPoint as individual slides, stay with us.
Why Insert Pictures as Individual Slides?
Images, visuals, and pictures are an important part of almost every PowerPoint presentation. Usually, each slide has one or two images as part of the presentation. But you can use an image as a single slide, and here is why you need to consider this:
- Saves time when working with large image collections
- Keeps your presentation structured and organized
- Ideal for portfolios, photo galleries, and storytelling
- Maintains consistent formatting across slides
Method 1: Using the Photo Album Feature in PowerPoint
The Pictures option in PowerPoint allows you to pick images for the selected slide only. The Photo Album feature not only allows you to pick multiple images, but each image is automatically added to an individual slide. Follow these steps to insert pictures in PowerPoint as individual slides.
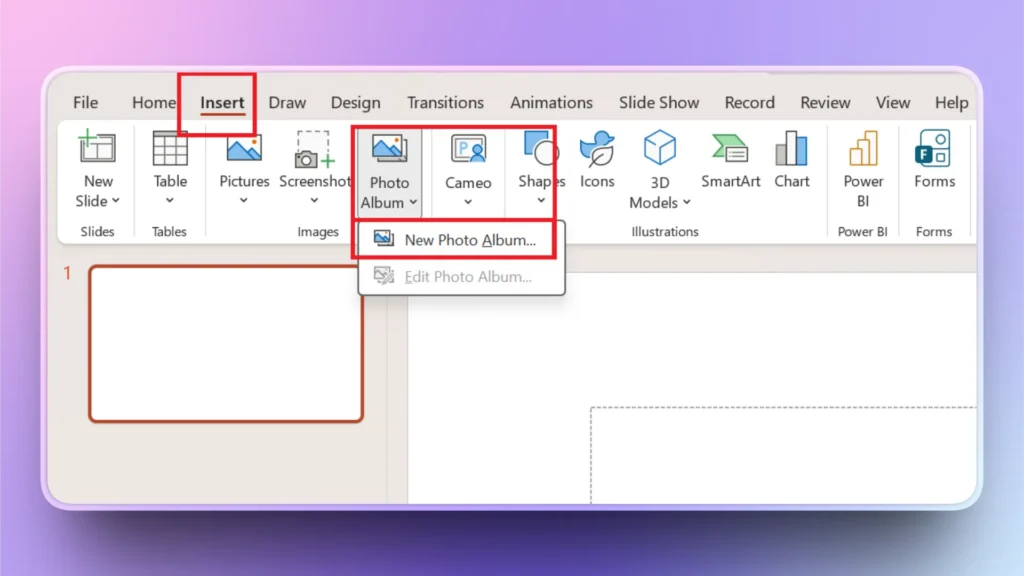
Step 1: Go to the Photo Album Feature
Open PowerPoint presentation, go to Insert >> Photo Album >> New Photo Album.
Step 2: Select Images
A new window will appear where you can select images from your computer by clicking the File/Disk option.
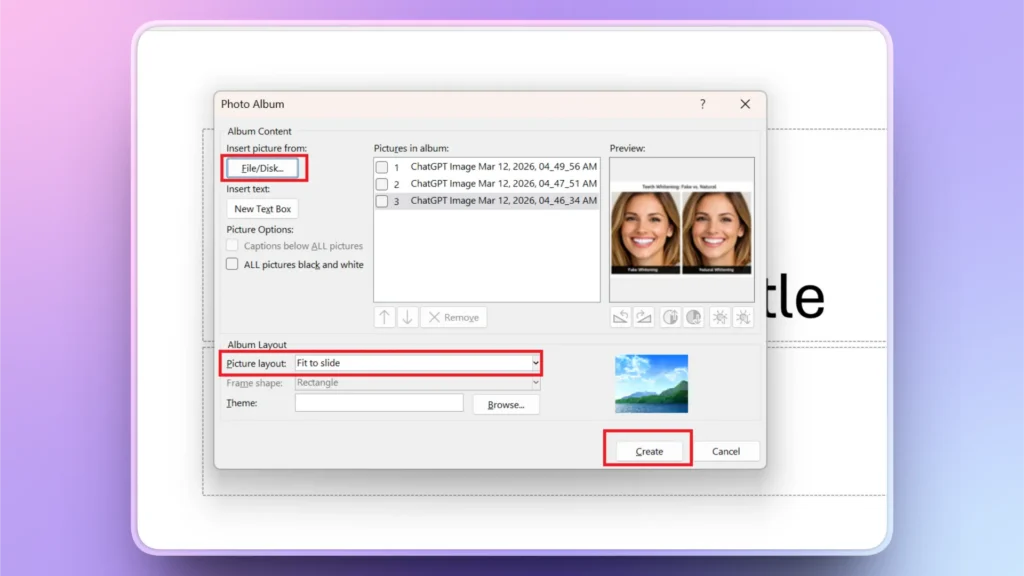
Select images and then also select the Fit to Slide option from the picture layout dropdown menu. Once all done, click Create.
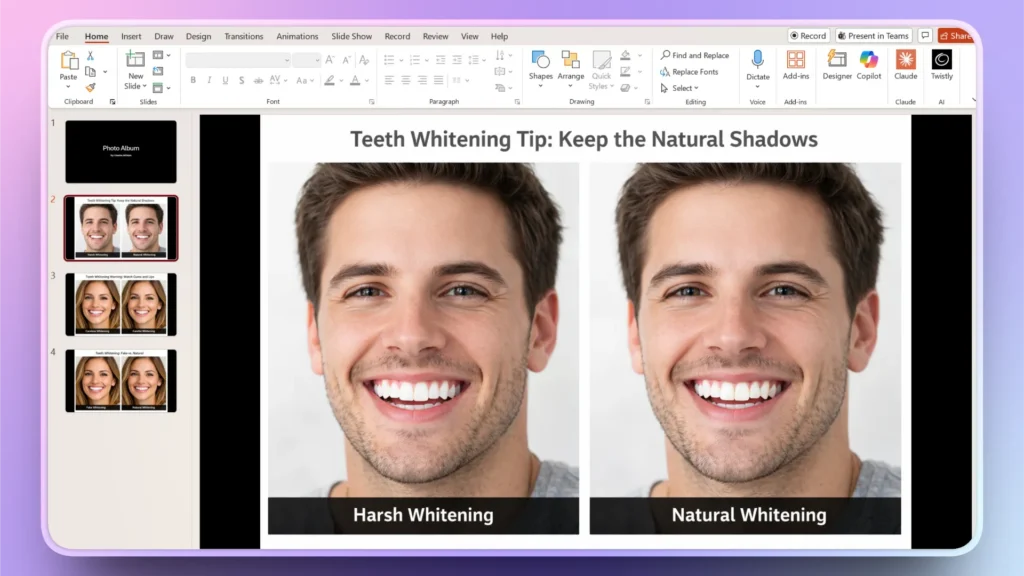
Step 3: Edit or Resize Images
PowerPoint will automatically adjust the images according to the slide, and each image will be added to an individual slide. If you need to make further changes, drag and resize images.
Method 2: Drag and Drop Images Manually
This method is the simplest and most straightforward method of adding images to the slides. But it will take time to drag and drop each image if you are working with large numbers of pictures.
- Open the PowerPoint presentation and the destination folder that has the images that you want to add to the slides.
- Select one image at a time from the folder and then drop it on the slide
- Open a new slide, drag another image, and drop it on the new slide
- Keep repeating this method and drop images on all slides
If you select multiple images and drop them on a slide, all selected images will be added to that single slide only. The right way is to select one image at a time or use the first method (Use Photo Album).
Method 3: Copy-paste Images to Slides
Another simple way to insert pictures in PowerPoint as individual slides is to copy an image from the computer folder and then paste it onto the slide.
You can use the mouse for copy-paste or use keyboard shortcuts (Ctrl + C) and (Ctrl + V). This method is only useful for small presentations with few images.
How to Add Images in PowerPoint with AI?
If you have the required images available and downloaded on your computer, then these methods are useful for you. With AI, you can create and insert custom visuals to PowerPoint slides with AI.
Twistly for PowerPoint
Twistly is an amazing AI add-in for PowerPoint that you can use to create custom AI images or get images from free stock media sites like Unsplash and Pexels.
Apart from adding images, you can use Twistly to create slides, generate complete presentations from scratch and use many more AI options from the available tools.
If you want to use Twistly for free before making any financial commitments, use the link below to download a free trial version. See for yourself how AI can improve your PowerPoint presentations.
Create PowerPoint
Slides with AI
Build AI-powered presentations from
any prompt, doc, or video


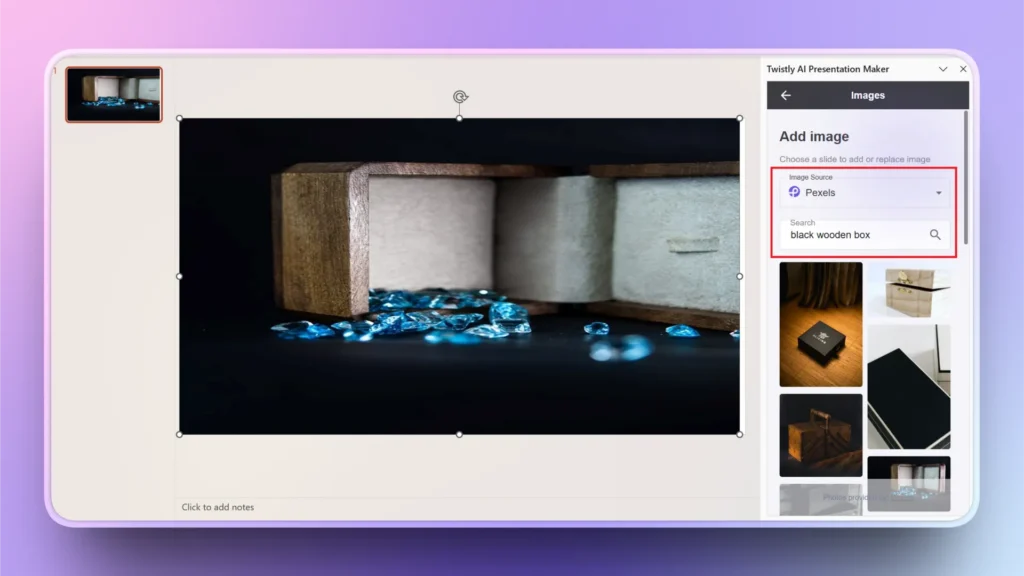
How to Add Custom Images with Twistly?
Once you have downloaded and installed Twistly for your PowerPoint software, using this AI presentation maker is quite easy. Even a first-time user can easily navigate all the tools and features of Twistly.
Step 1: Open PowerPoint and Twistly
Start a new blank PowerPoint presentation and click the Twistly icon at the top, and click Edit slides. Then, from the next screen, click the ” Add Images option.
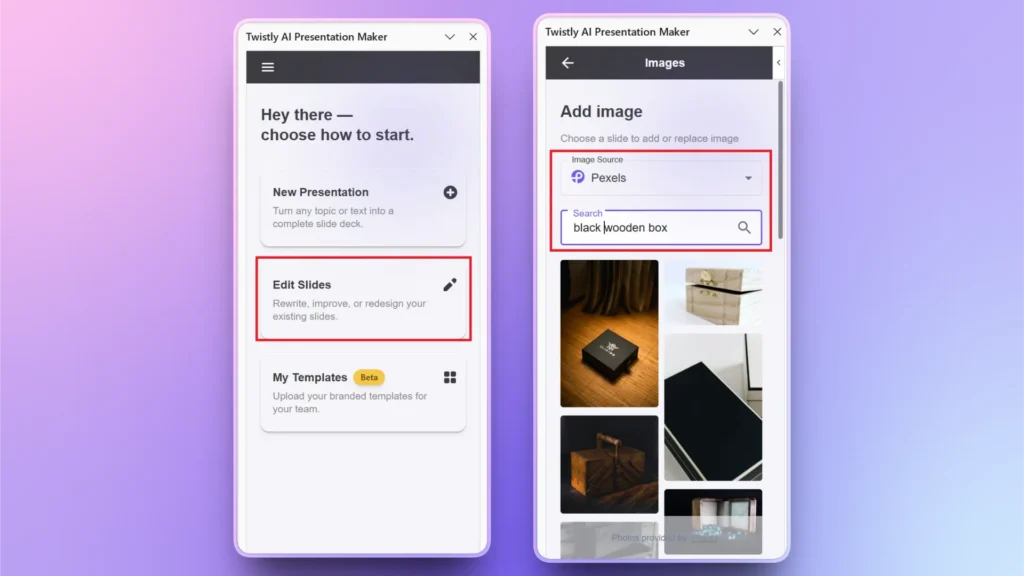
Step 2: Search or Create Image
Choose Image Source as AI Images or choose any other option from the dropdown list. Let’s say we have chosen Pexels as the image source.
- Write your keyword or search term in the box
- Select the required image, hover your mouse over the image, and click the Insert button.
- The image will be automatically added to the slide.
- If you want to replace the added image with any other image, click the Insert button for the new image, and the existing image will be replaced with the new one.
Tips for Better Image Slides in PowerPoint
If you want the best results and customized images and visuals for your presentations, use the Twistly add-in. Here are some common tips that can help you get the best image slides for your presentations.
- Use high-quality images only for slides.
- Maintain a consistent aspect ratio for all images
- Adding transitions to your image slides can also increase interactivity
- Compress images to keep your presentation lighter
- Use an appropriate name for each image and add alt text for a better experience
Final Verdict
The Photo Album feature in PowerPoint is the right way to insert pictures in PowerPoint as individual slides. For few images, you can use drag and drop or copy-paste methods, too.
No matter which method you choose, make sure you have the relevant images available that add value to the presentation. For creating custom AI images in PowerPoint, use Twistly and enjoy unlimited stock images and AI images inside PowerPoint.
Download Twistly now and create a complete presentation from scratch within a few minutes. This one add-in can elevate your PowerPoint experience to a whole new level.
Create PowerPoint Slides with AI
Build AI-powered presentations from any prompt, doc, or video


Start Making AI Presentations in Seconds
Instant Access
Begin exploring Twistly’s full suite of features immediately
No Commitments
No credit card required, and you can cancel anytime
Dedicated Support
Our team is here to assist you every step of the way during your trial.