
Optimized and creative display of information and important data is vital in the digital age. Users and viewers are bombarded with different facts, and you want them to remember the most important ones. One way to highlight important data is to create a word cloud in PowerPoint.
Plain data may not motivate your audience enough to take action or make decisions. Eye-catching and easy-to-process information helps with quick decision-making. A word cloud can have the most important terms or terms that are too often used in your work or presentation.
Word Cloud in PowerPoint
For some users, the term “word cloud” may be a new and complex term, but you probably have already seen one. Do you know what a word cloud is? How do you create one for your presentation slide? Let’s start with the basic concept of a word cloud.
What is a Word Cloud?
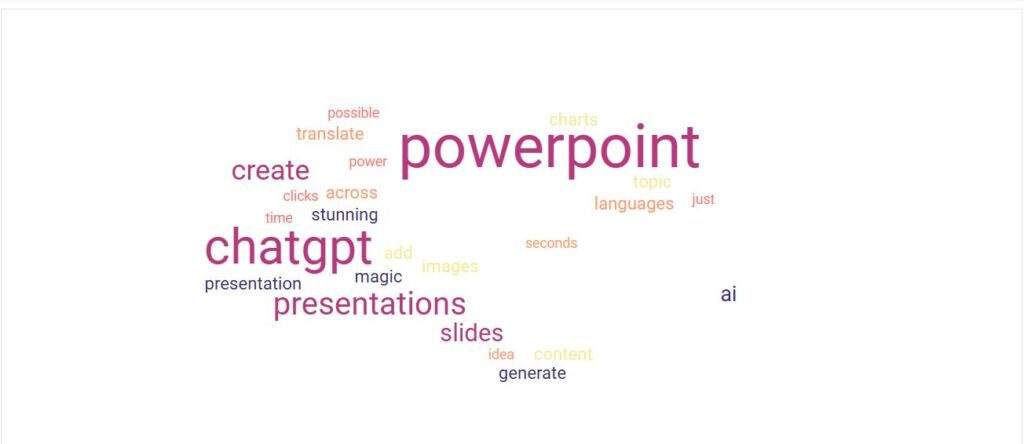
Tah cloud or word cloud is the same thing. A word cloud visualizes the most important words or keywords in a text or article. More frequently used words appear bold and large, while less-used words are smaller. This is what a word cloud might look like.

There are online tools and word cloud generators where users feed in their most frequently used keywords, and the tool creates an appealing image based on the frequency of the words.
Create a Word Cloud in PowerPoint
You might have seen amazing visuals and word clouds in professional presentations. Everything displayed in slides is not necessarily designed only in PowerPoint. Some presenters use online editing tools, while others like add-ins provided for PowerPoint.
Currently, there is no straightforward way to create a word cloud in PowerPoint using readily available tools or functions. Someone might find a creative way to manipulate a text box to create a tag cloud, but it is not easy for everyone. Now, we will see the two easiest ways to create a word cloud in PowerPoint.
Method 1: Use an Online Word Cloud Generator
One of the easiest ways to create a word cloud for a presentation slide is to use a free and reliable online word cloud generator. Different generators require different inputs.
Some might want you to enter the keywords only, while others allow pasting entire text. The tool then automatically detects the frequently used words. Follow these steps to create a word cloud with an online generator.
Step 1: Go to an online word cloud generator site and input your text or keywords only. You can also make desired changes to the word cloud, such as changing the color, font style, or highlighted words.
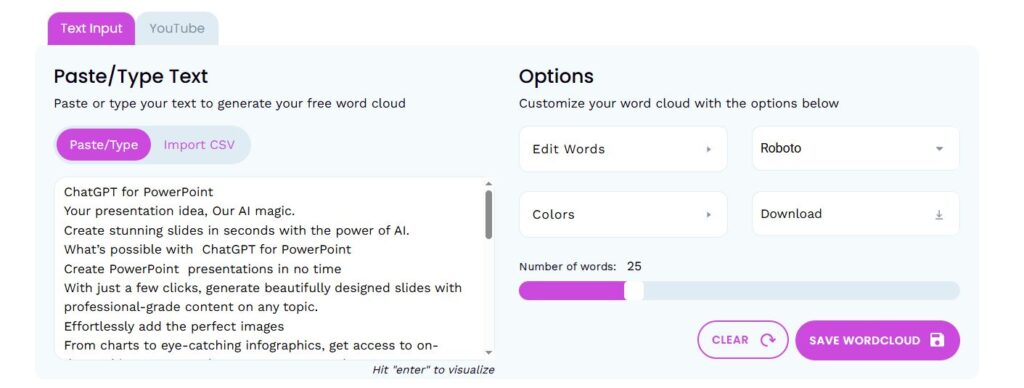
Step 2: Review the generated word cloud and make changes to the background or colors of the text. If everything is fine, download the image in the desired format.
Step 3: Open your PowerPoint presentation and select the slide where you want to insert the word cloud. If you know how to insert media in PowerPoint, you can also simply drag and drop the image onto the slide.
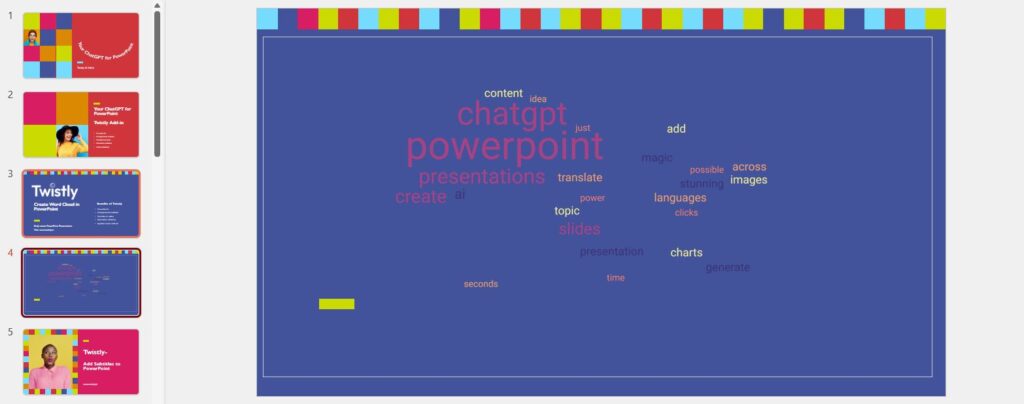
This word cloud is an image, and you can apply all the changes and settings available for images. Manipulate and edit the image according to the theme of the template.
Method 2: Use PowerPoint Add-in
There are different add-ins available for PowerPoint that make your life a lot easier. You already know how to use a custom ChatGPT for PowerPoint add-in, and a similar add-in can be installed for creating a word cloud, too. Here are the simple steps to make a word cloud with the PowerPoint add-in.
Step 1: Open your new or existing presentation and go to the Add-ins section from the Home tab. Click on the button and enter “Word Cloud” in the search bar. Different add-ins will appear; install the desired one.
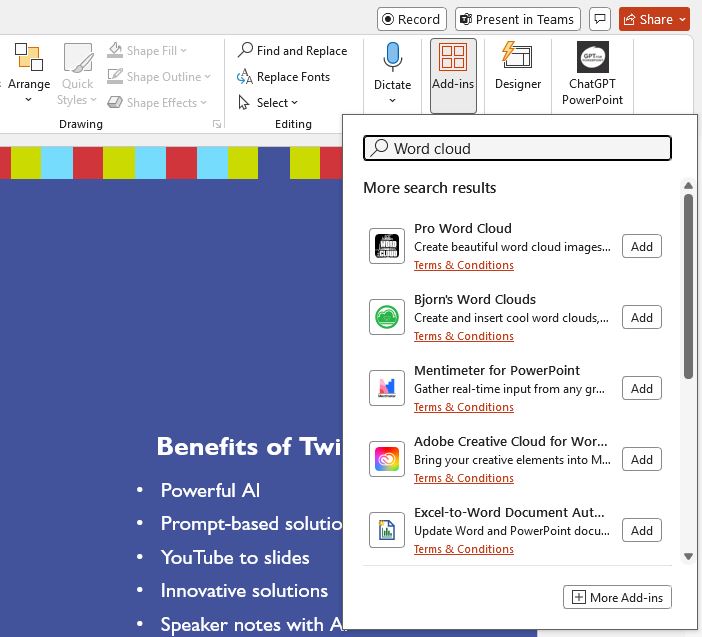
Step 2: Install the add-in, use the add-in interface to input your data, and then create a visually appealing word cloud for your presentation slides.

This method offers less flexibility, as online tools use AI to produce better and more appealing results. But some add-ins might blow your mind with powerful features and advanced AI capabilities, and Twistly is one of the most trusted presentation add-ins for PowerPoint.
Best Add-in for PowerPoint Presentations
While we are on the topic of add-ins for PowerPoint, how can we skip mentioning your ChatGPT for PowerPoint? Would you like to integrate the power of ChatGPT into your PowerPoint presentations? If the answer is yes, you need to download the Twistly add-in for PowerPoint.

Twistly is trusted by thousands of users from all over the world and different disciplines. From students to marketers and instructors, everyone benefits from our AI add-in for making awesome presentations.
What can Twistly do?
In simple words, Twistly can do everything a professional presentation maker can. From writing content for the slides to adding images and styling slides, Twistly has lots of features that make it your personal assistant for making professional presentations.
You can try the Twistly add-in for free for a limited time and then upgrade to the full premium version whenever you are satisfied. There are some powerful features that you won’t find anywhere else.
Create PowerPoint
Slides with AI
Build AI-powered presentations from
any prompt, doc, or video


Conclusion
The easiest way to create a word cloud in PowerPoint is to use an online word cloud generator or add-in. We highly recommend installing only trusted add-ins for any software. If you want to unlock the full potential of AI for PowerPoint, try Twistly today.
Frequently asked questions


Start Making AI Presentations in Seconds
Instant Access
Begin exploring Twistly’s full suite of features immediately
No Commitments
No credit card required, and you can cancel anytime
Dedicated Support
Our team is here to assist you every step of the way during your trial.