


PowerPoint presentations can take hours to make and sudden system glitch or unwanted changes by someone else can ruin your work. Once you have saved the changes, you might think that you cannot go back to the previous version of PPT.
How to view version history in PowerPoint to restore the previous files? Where is the version history option in PowerPoint and how to access it? This article will make sure you don’t lose any file, every again.
To avoid such incidents and mistakes, we highly recommend using AutoSave feature in PowerPoint. This feature will automatically save your presentation after a certain time. Users can modify the duration for automatic file save attempt.
What is AutoSave in PowerPoint?
Autosave is a feature in PowerPoint that automatically saves changes to a presentation every few seconds when it is stored on a cloud service like OneDrive or SharePoint. Users need to connect their personal OneDrive or their organization’s account to PowerPoint to enable this feature.
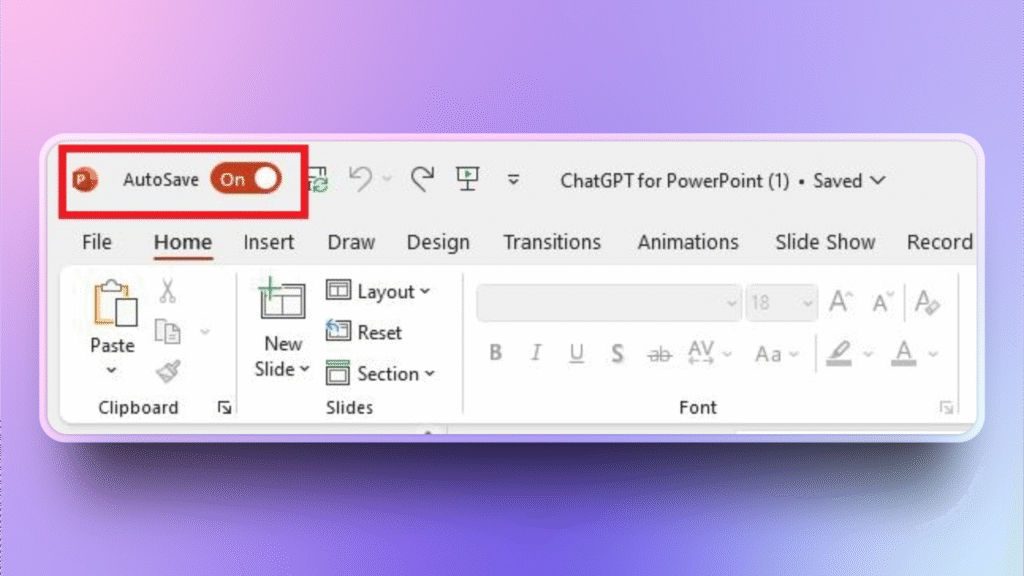
You can find a small toggle at the upper left corner of PowerPoint window. Turn the toggle on and you will be asked to connect and verify your account. Once verified, your presentation progress will be saved automatically after set time.
View Version History in PowerPoint
Version history is usually available for presentations with the AutoSave feature on. Make sure the AutoSave feature is on so that all progress is automatically saved to your cloud storage account.
Now, imagine you are working on a PowerPoint presentation, but you think that recent changes are not good enough, and you want to restore the previous version. Pressing CTRL+Z won’t do the trick because you want to restore the previous version, instead of undoing the recent changes.
In this situation, you can view the version history and restore the version that you want. Here are simple steps on how to view version history in PowerPoint.
Step 1: Open PowerPoint Presentation
Open the current version of the PowerPoint presentation and make sure you are connected to the internet to access the previous version of the file from your cloud storage account, OneDrive.
Step 2: Click the PPT Name Tab
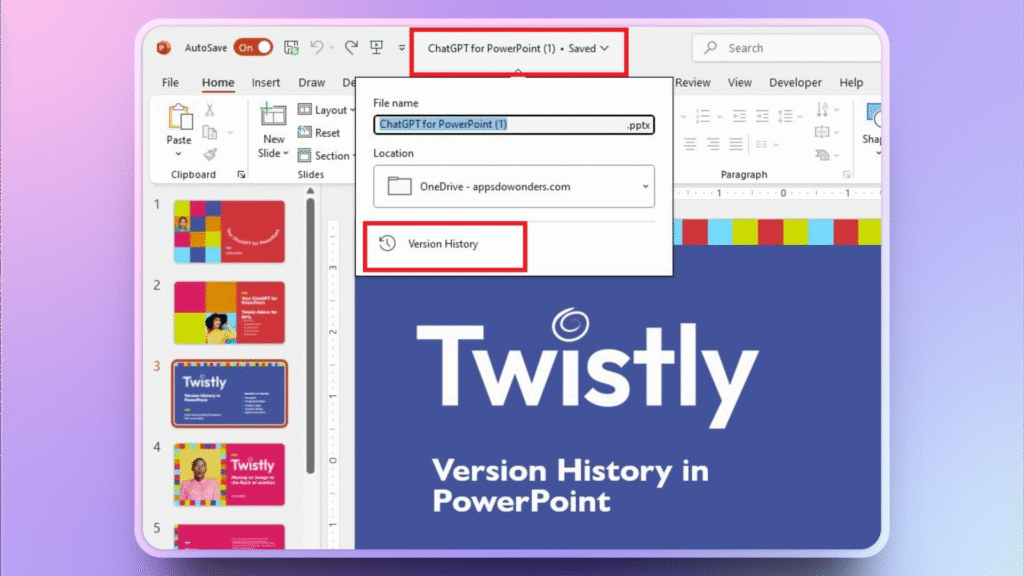
Do you see a tab with the presentation name at the top, right next to the AutoSave toggle? Click the name tab, and a dropdown menu will appear.
Click the Version History button from the menu. This menu will also show the destination folder of the saved presentation on your account.
Step 3: Locate your Required Version of PPT
A separate window will appear on the right side of the screen where you will see different available versions of the presentation.
The “Open Version” represents the active version that you are currently working on, while the other versions are the versions that you last worked on.
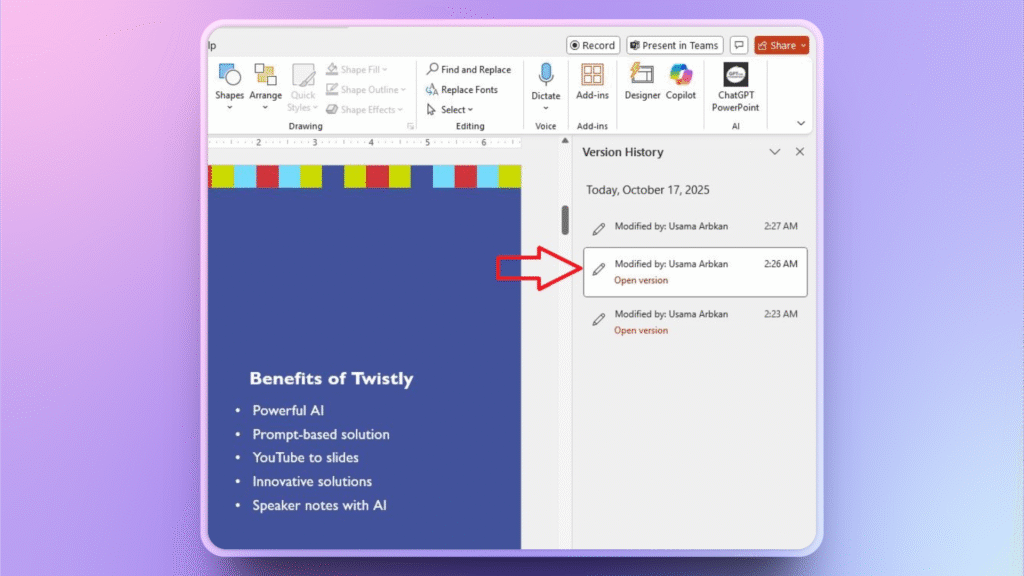
You also see the author’s name and time stamp so that it is easy to track changes while collaborating with other team members.
Step 4: Restore Previous Version
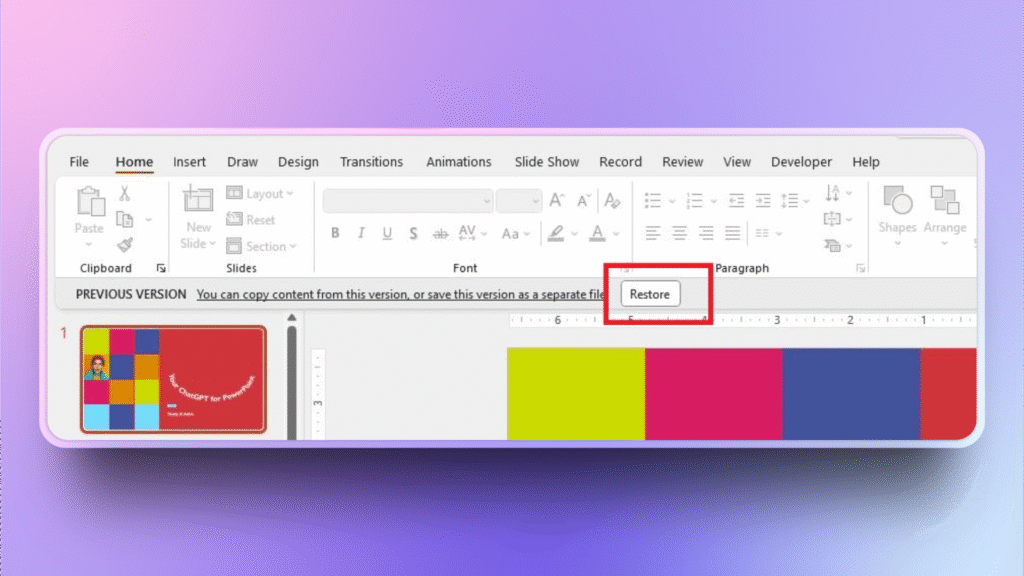
Click any version and a new PowerPoint window will open with the selected version of the presentation. Click the Restore button and now you can make changes to the restored version and save it as separate file.
How to Change AutoSave Settings in PowerPoint?
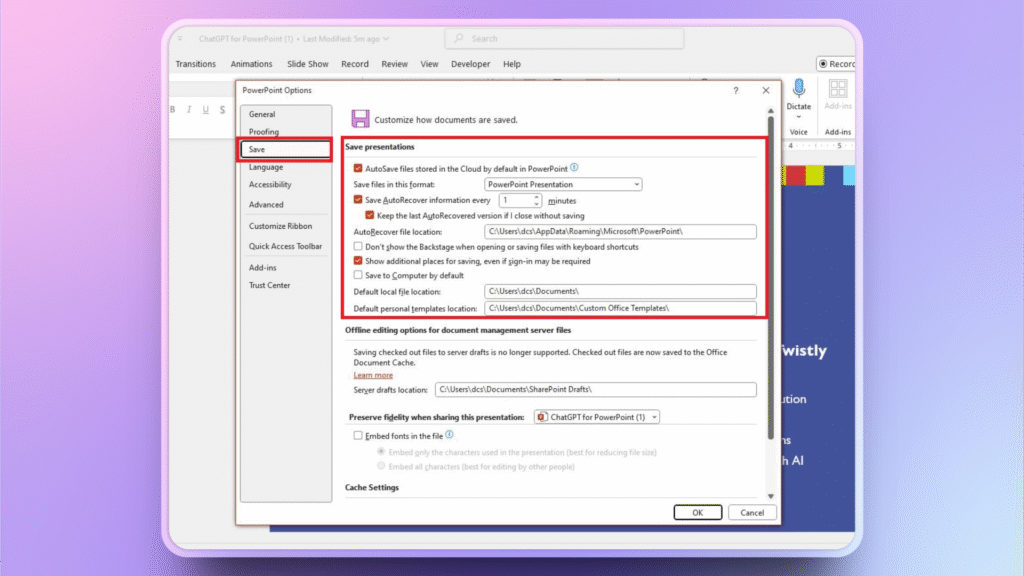
PowerPoint offers multiple settings related to the AutoSave feature that you can adjust according to your needs. Click File >> Options and you will see different settings in the new pop-up window.
How to Make Last-minute PPTs like a Pro?
You have lost the final version of your important PowerPoint presentation, or cannot restore the desired version. You messed up the upcoming meeting. Well, you don’t need to panic as we have the perfect solution to create professional PowerPoint presentations within minutes.
Twistly is an AI add-in for PowerPoint that works inside PowerPoint software and allows users to generate slides and complete presentations from AI prompts, topics, and other input methods.

How does Twistly Work?
Twistly is powered by the latest AI models, and it integrates ChatGPT-like capabilities into PowerPoint. Making complete presentations or selected slides does not take more than a minute or two. Here are the simple steps to make last-minute PowerPoint presentations with AI:
- Open PowerPoint and launch Twistly, select the input method to create a presentation
- Input your prompt, topic, or text, select the number of slides, and adjust other settings
- Review the AI-generated outline and make changes if needed
- Select an AI PowerPoint template from the Twistly library and wait for a few moments
- Your professional presentation is ready, so you can edit or present right away
These five simple steps can give you an attractive presentation in less than 90 seconds. You always have access to all native features of PowerPoint. There are no limitations or restrictions in any way.
Download Twistly for Free
There are many other AI features that can improve your PowerPoint experience and help you master the art of professional presentations. New users can try the free trial version of Twistly for a limited time. Download Twistly now and start making PowerPoint presentations that can impress anyone.
Create PowerPoint
Slides with AI
Build AI-powered presentations from
any prompt, doc, or video


Conclusion
You can view version history in PowerPoint and restore the previous version by using the AutoSave feature. Make sure you have turned on the AutoSave feature so that unwanted glitches and errors don’t interfere with your workflow.
If you ever feel stuck due to tight deadlines, don’t worry, as Twistly can generate attractive and professional slides just within a few seconds. Instead of switching between random AI tools, install Twistly and enjoy a custom ChatGPT for PowerPoint.


Start Making AI Presentations in Seconds
Instant Access
Begin exploring Twistly’s full suite of features immediately
No Commitments
No credit card required, and you can cancel anytime
Dedicated Support
Our team is here to assist you every step of the way during your trial.