

Human touch can make any learning experience more engaging and effective. Students can pay more attention if video narration is available to explain complicated topics. As an instructor, teacher, or marketer, how do you record yourself on PowerPoint?
How to record a presentation where you can add real-time video recording of yourself explaining the slides? PowerPoint has a built-in Record option where presenters can record video or audio narration without using any 3rd party application.
Why Record Yourself on PowerPoint?
Presenters try every possible tool or way to make their presentations more dynamic and effective. Live commentary on the complex contents of the slides can improve message delivery and learning experience for the viewers.
The most common use case of the Record feature is for instructors who share their PPT slides with different classes and students. As the topics and lessons are the same, instructors record themselves explaining the slides and then share the slides with video narration with their classes.
Benefits of Recording Yourself
This way, learning how to record yourself on PowerPoint can save you from repetitive efforts. There are many additional tools and features that presenters can use while explaining the slides.
We will explain everything in detail on how to record yourself on PowerPoint. Before beginning, here are some benefits of using this feature for tutorials, marketing presentations, and distance learning lessons:
- Higher engagement due to the human touch in the presentation
- Content clarity due to live narration by the presenter
- Stronger and more interactive connection between presenters and audience
- Demonstrate your experience and skills in a more elaborate way
Steps to Record Yourself on PowerPoint
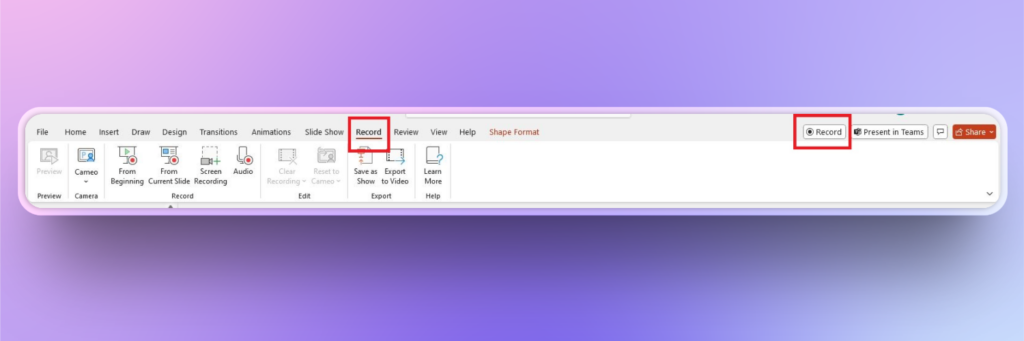
There is a dedicated Record tab in the top ribbon that offers different controls to record yourself, or you can also use the Record button in the top right corner, as shown in the image below.
Step 1: Choose the Recording Preferences
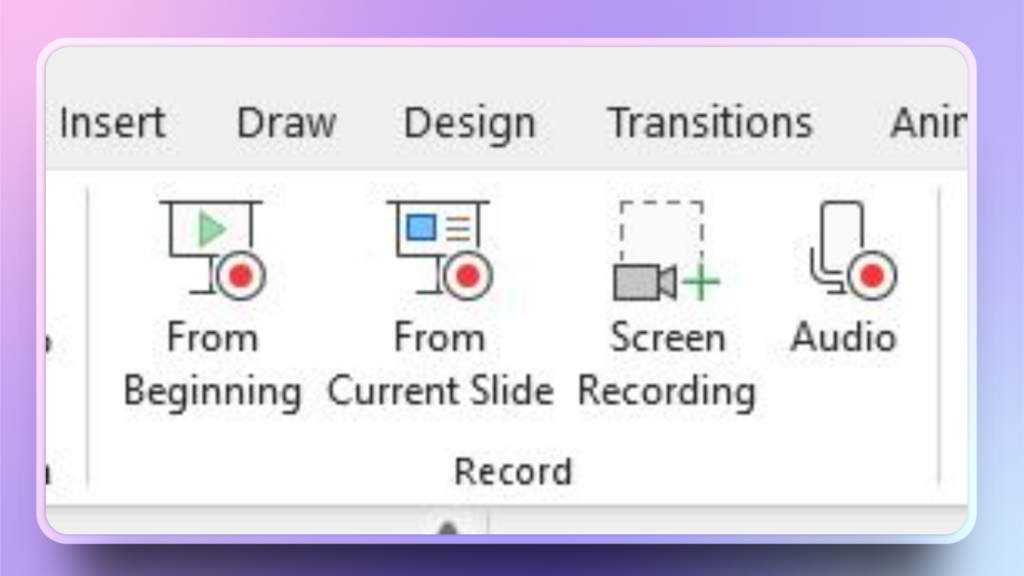
PowerPoint offers different recording choices for a personalized experience. Select the right settings before starting the recording so that you can smoothly focus on the message delivery. You can choose to start the recording:
- From beginning
- From the current slide
- Screen recording
- Audio recording
Step 2: Recording Screen View
Let’s say we want to start recording from the current slide, click the button, and you will see the given screen with different options. Note that the recording has not started yet. We need to make sure that everything is set as per the requirements.
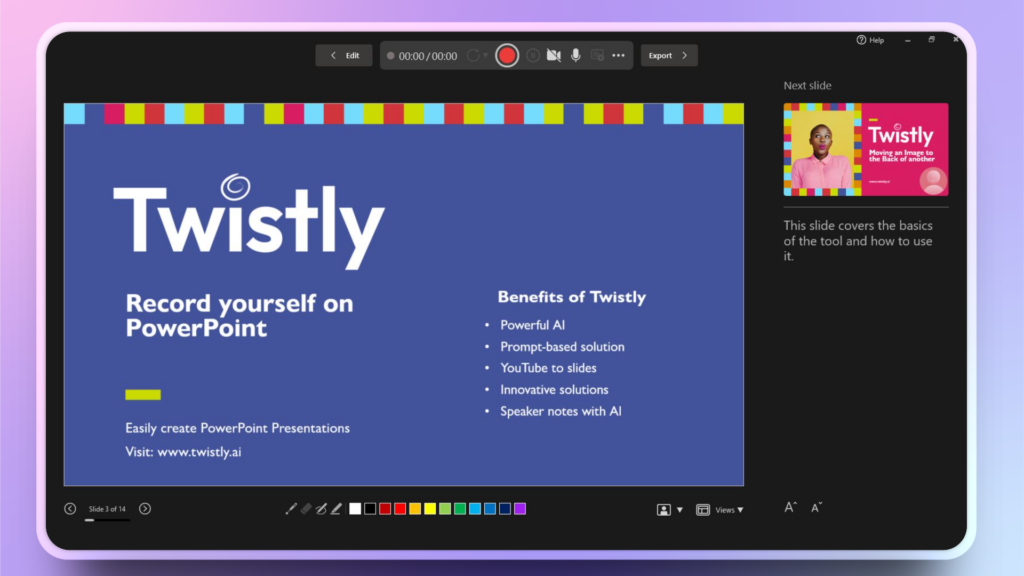
Here, you have different options. Let’s break down the tools and options.
Top Ribbon
- Edit button to go back to normal presentation
- Timer
- Retake, start/stop, pause buttons
- Camera on or off
- Microphone
- Other options button
Right Pane
Depending on the view, the right pane can show the thumbnail of the next slide and the speaker notes.
Bottom Menu
- Slide controls for next and previous slides
- Laser or marker controls for the presentation
- Background show/hide controls
- View options
- Font size controls
Step 3: Start Recording and Save Video
Once you have adjusted the settings for the recording, press the start button and start recording yourself. You can change views or move to the next or previous slides as you want.
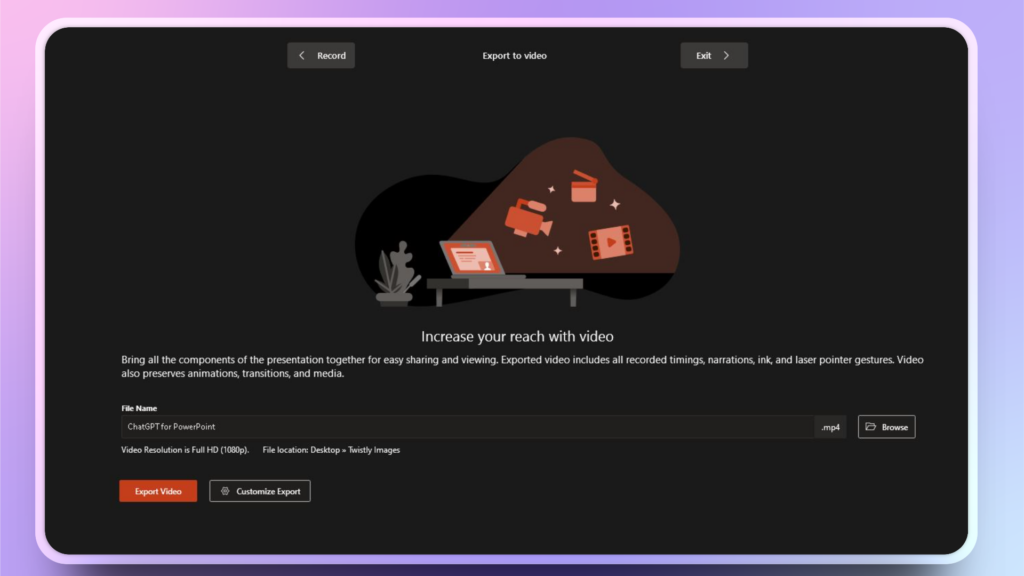
For any specific slide, you can also retake the recording and once done, click Export to save your video to your computer.
Now, choose the destination folder and name your recording, and it will be saved on your device. Play it to review the recording and share with others if everything is perfect.
How to Make a Presentation More Engaging?
Recording yourself on PowerPoint is a great way to make your PPT slides more engaging, but it takes time, and you have to be an expert on the topic. There are two major challenges that we want to solve for a normal user:
- Manual editing and explanation take more time
- You have to be an expert on the topic of the presentation
With our recommended tool, anyone can generate detailed speaker notes on any topic, for a specific slide or an entire presentation.
Generate Speaker Notes with AI
Do you need talking points for your presentation slides but don’t have time to find the relevant data and information? Use Twistly to generate speaker notes for your presentation with AI, within a few clicks.
Twistly is an AI add-in for PowerPoint that works like ChatGPT for presentations and can make presentations, improve them, write speaker notes, and perform many other tasks accurately.
How to Generate Speaker Notes with Twistly?
It is easy to work with Twistly as it is designed for a wider audience, including pros and beginners. Follow these steps to generate speaker notes with Twistly.
Step 1: Launch Twistly and Click Speaker Notes
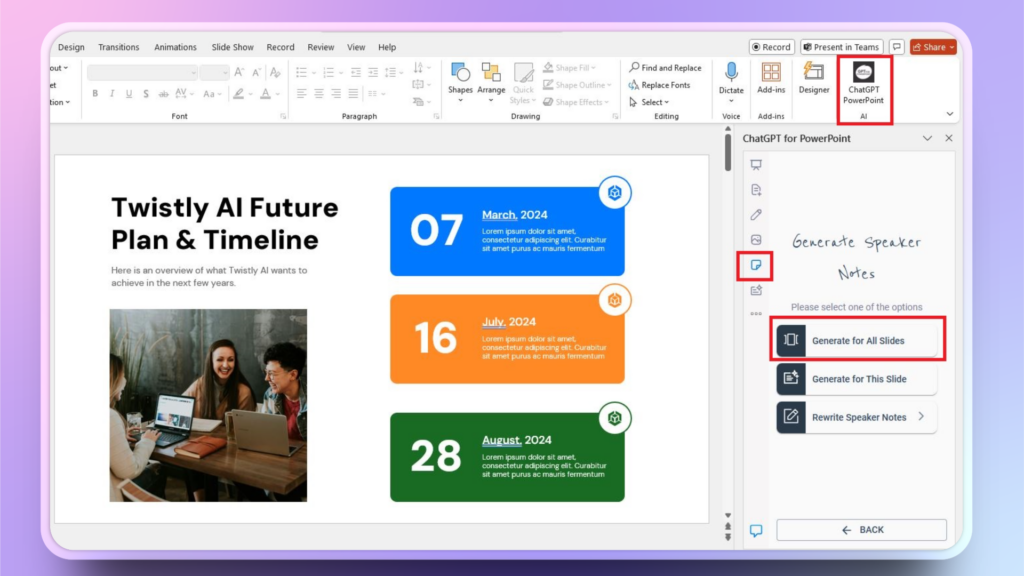
Open the PowerPoint presentation, launch Twistly, and choose the 5th option from the right menu, Speaker Notes. From the speaker notes screen, you choose to:
- Generate for all slides
- Generate for this slide
- Rewrite speaker notes
Step 2: Generate Speaker Notes
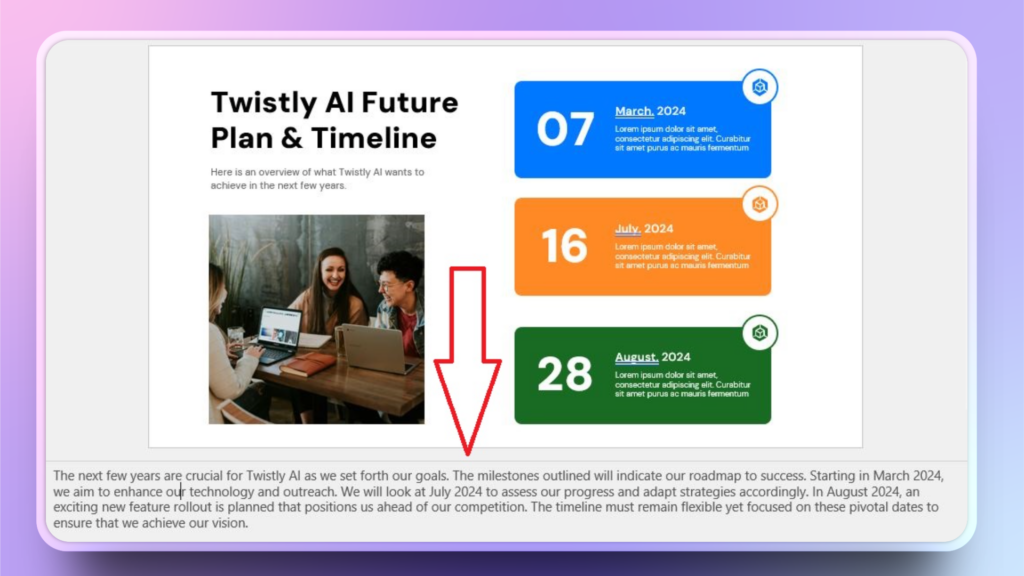
We will create speaker notes for all slides. Twistly will take a few moments to generate speaker notes for all slides, and you will receive a notification once the tool is done.
Look under the slide view, you will see that every slide has talking points for the speaker to make the presentation delivery more engaging, without any manual efforts.
Try Twistly for Free
Twistly is one of the best AI presentation makers for PowerPoint in 2025. There are many tools that you will love as a PowerPoint user. Try the free trial version of Twistly, and once you find Twistly worth it, upgrade to the paid version and enjoy your own ChatGPT for PowerPoint.
Create PowerPoint
Slides with AI
Build AI-powered presentations from
any prompt, doc, or video


Conclusion
This is how to record yourself on PowerPoint or use Twistly to generate speaker notes for effective presentation delivery. It’s your choice whether you want to be the most productive member of the team with Twistly or want to waste hours daily on making some boring presentations.
AI is your friend in personal and professional life, and you just need the right tool, like Twistly, to use AI for your daily tasks. Presentations don’t need to be boring and frustrating, and Twistly has proved it.

Start Making AI Presentations in Seconds
Instant Access
Begin exploring Twistly’s full suite of features immediately
No Commitments
No credit card required, and you can cancel anytime
Dedicated Support
Our team is here to assist you every step of the way during your trial.