

The hardest part of making a professional presentation is arranging and editing photos and media. A PPT looks boring without media, attractive photos, and other shapes. But when you try to spice up the presentation, you face challenges with slide designs and formatting. For two images, how to move an image to the back of another image? How to place an image below another image in PowerPoint?
If you are skilled at editing photos with photo editing tools, you can insert custom images into the slides. However, if you want to rely on PowerPoint’s built-in editing features, you need to be creative. PowerPoint has limited tools for visual optimization, but for a common user, these features are good enough.
Moving an Image below another Image
Stacking images on a slide is a complicated task, and without proper knowledge of graphic design concepts, you may not get the desired results. But for our readers who have a clear understanding of the visual hierarchy, this guide can be a good start.
Add and Arrange Images for Slides with AI
Build AI-powered presentations from any prompt, doc, or video

You can move an image to the back of another image in PowerPoint, but this stacking must add value to the presentation. Random images cannot be used for this procedure. Before learning how to move an image to the back of another image, here are some important terms that every reader needs to understand.
Bring to Front: This command brings an image to the front of all layers. If the design has five layers, moving an image to the front will place it above all five layers.
Bring Forward: This action moves an image one layer forward. From layer three, forward action will move to the latter two.
Send Backward: Use this action when you need to send an item one step backward.
Send to Back: Sending to the back means moving an image or an object below all layers.
Steps to Stack Images in PPT
Now, you can arrange two or more images on a slide. This tutorial will use a logo and a banner to help you understand how moving an image to the back or front works. Follow these steps to stack one image above or below another.
Step 1: Insert images into the slide. You can have more than two images, but the proper arrangement of the images is necessary to use this design concept.
Step 2: Select the image you want to move below or above other images or layers. Then, navigate to the Picture Format tab.
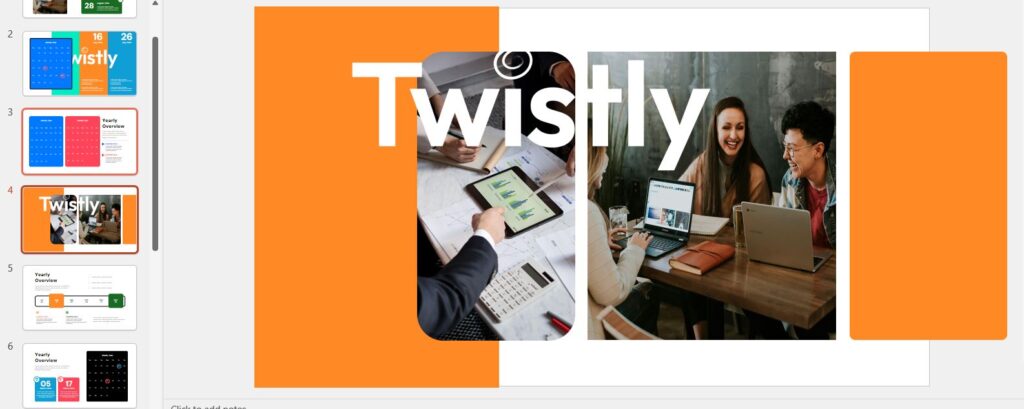
In this case, we are using the Twistly logo to move above or below the existing images in the slide.
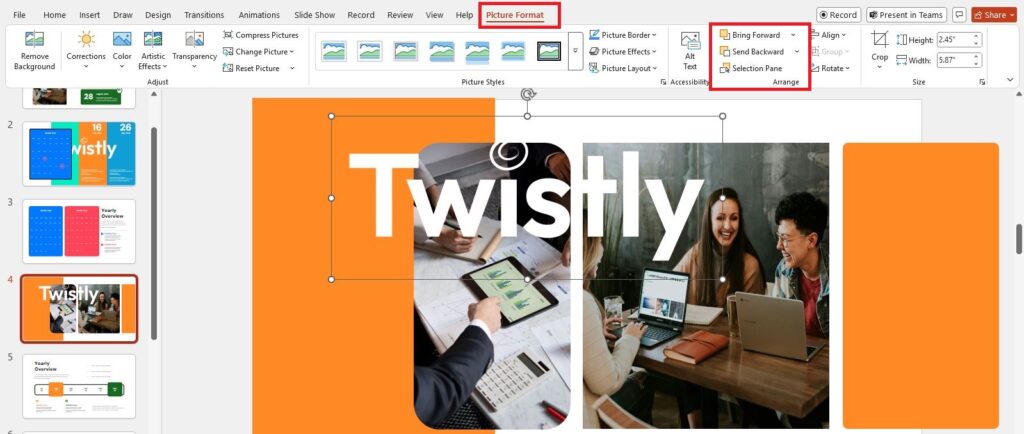
Step 3: Go to the arrange section and click the “Send Backward” button. If you want to move, send it one layer back.
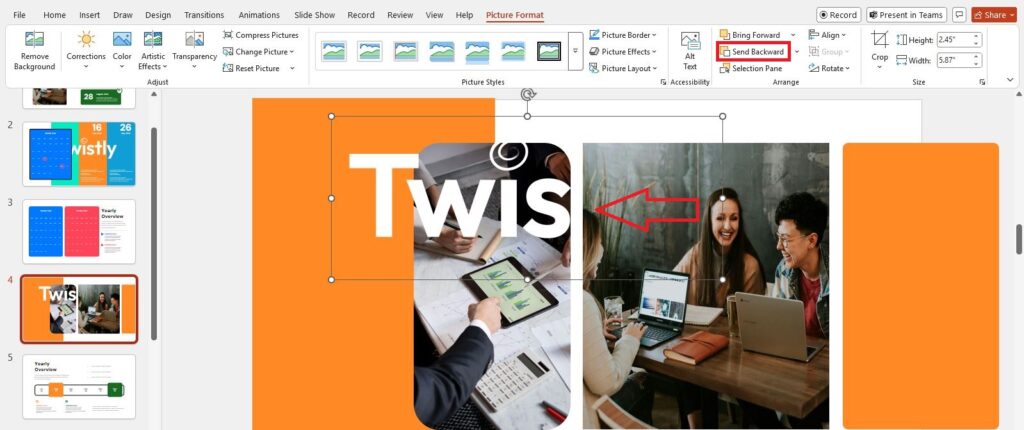
As you can see, a part of the logo is now behind the image, and only half of the logo is visible on the slide. This action sent the logo behind the first layer.
Step 4: If you want the logo to be below all layers, click on the Send Backward button to access the menu. Then, choose the “Send to Back” option, and the logo will be moved below all layers.
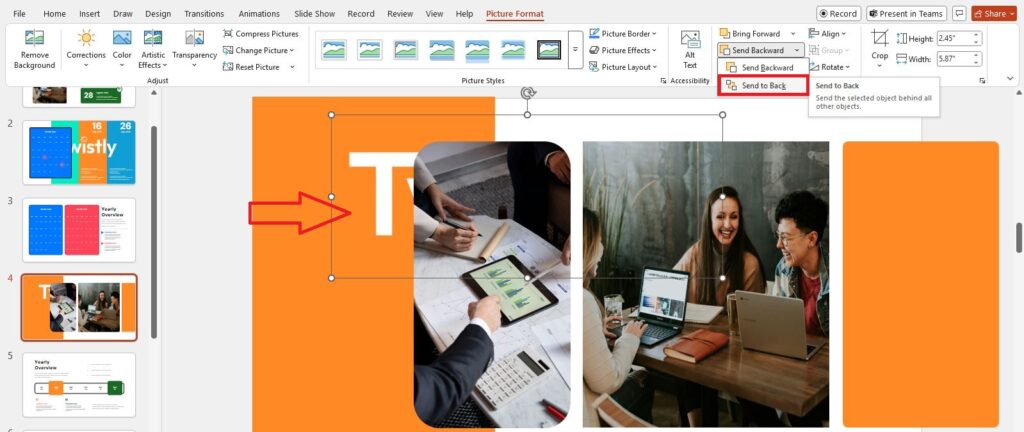
Bring Image to the Front
Now, the logo is behind all layers. If you want to bring it to the front or one layer above, use the “Bring Forward” option or access the “Bring to Front” button, and your image will appear on top of all images and layers on the slide.
Arrange and Format Images with AI
Making your presentation visually appealing takes time, effort, and understanding of the design elements. But if you aren’t good with graphics and don’t want to waste time on useless edits, try AI for PowerPoint presentations.
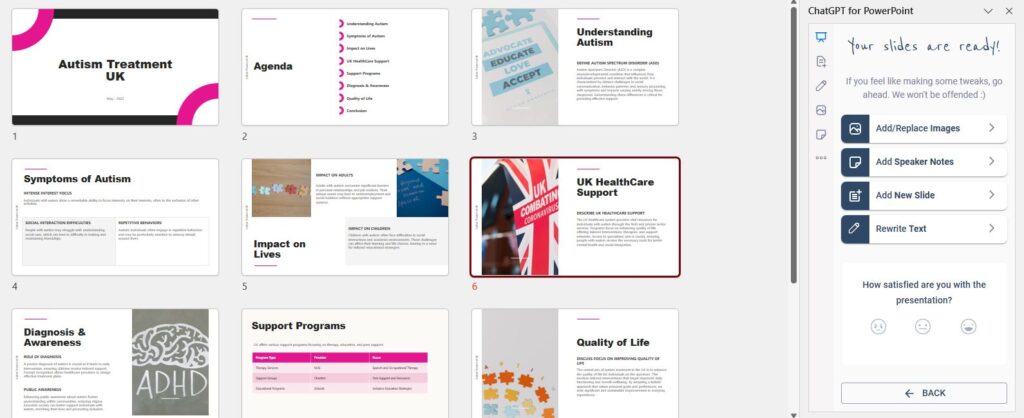
ChatGPT has revolutionized different fields, and you can use the power of ChatGPT for PowerPoint with Twistly. Twistly is an AI add-in for PowerPoint that works as a professional presentation maker. From writing text to adding relevant images and visuals to the slides, Twistly takes care of everything.
Use Twistly for Appealing Slides
Once you provide the topic or prompt, Twistly processes the data and creates amazing slides with a professional template. It adds content and arranges images to make your slides more appealing.
You don’t have to find or upload images; Twistly inserts images from the online libraries automatically, so you can just sit tight and relax. This is how a presentation made with Twistly looks.
Conclusion
The Picture Format tab has options to move an image to the back of another image in PowerPoint. For best results, use Twistly to create PPTs. When you don’t know what will work best for your topic or you don’t have the time or expertise, let the AI do the hard work for you.
You can try Twistly for free, and if you find it useful for your presentation needs, you can upgrade to the premium version for an affordable price.
Frequently asked questions


Start Making AI Presentations in Seconds
Instant Access
Begin exploring Twistly’s full suite of features immediately
No Commitments
No credit card required, and you can cancel anytime
Dedicated Support
Our team is here to assist you every step of the way during your trial.