How to Make Curved Text in PowerPoint?
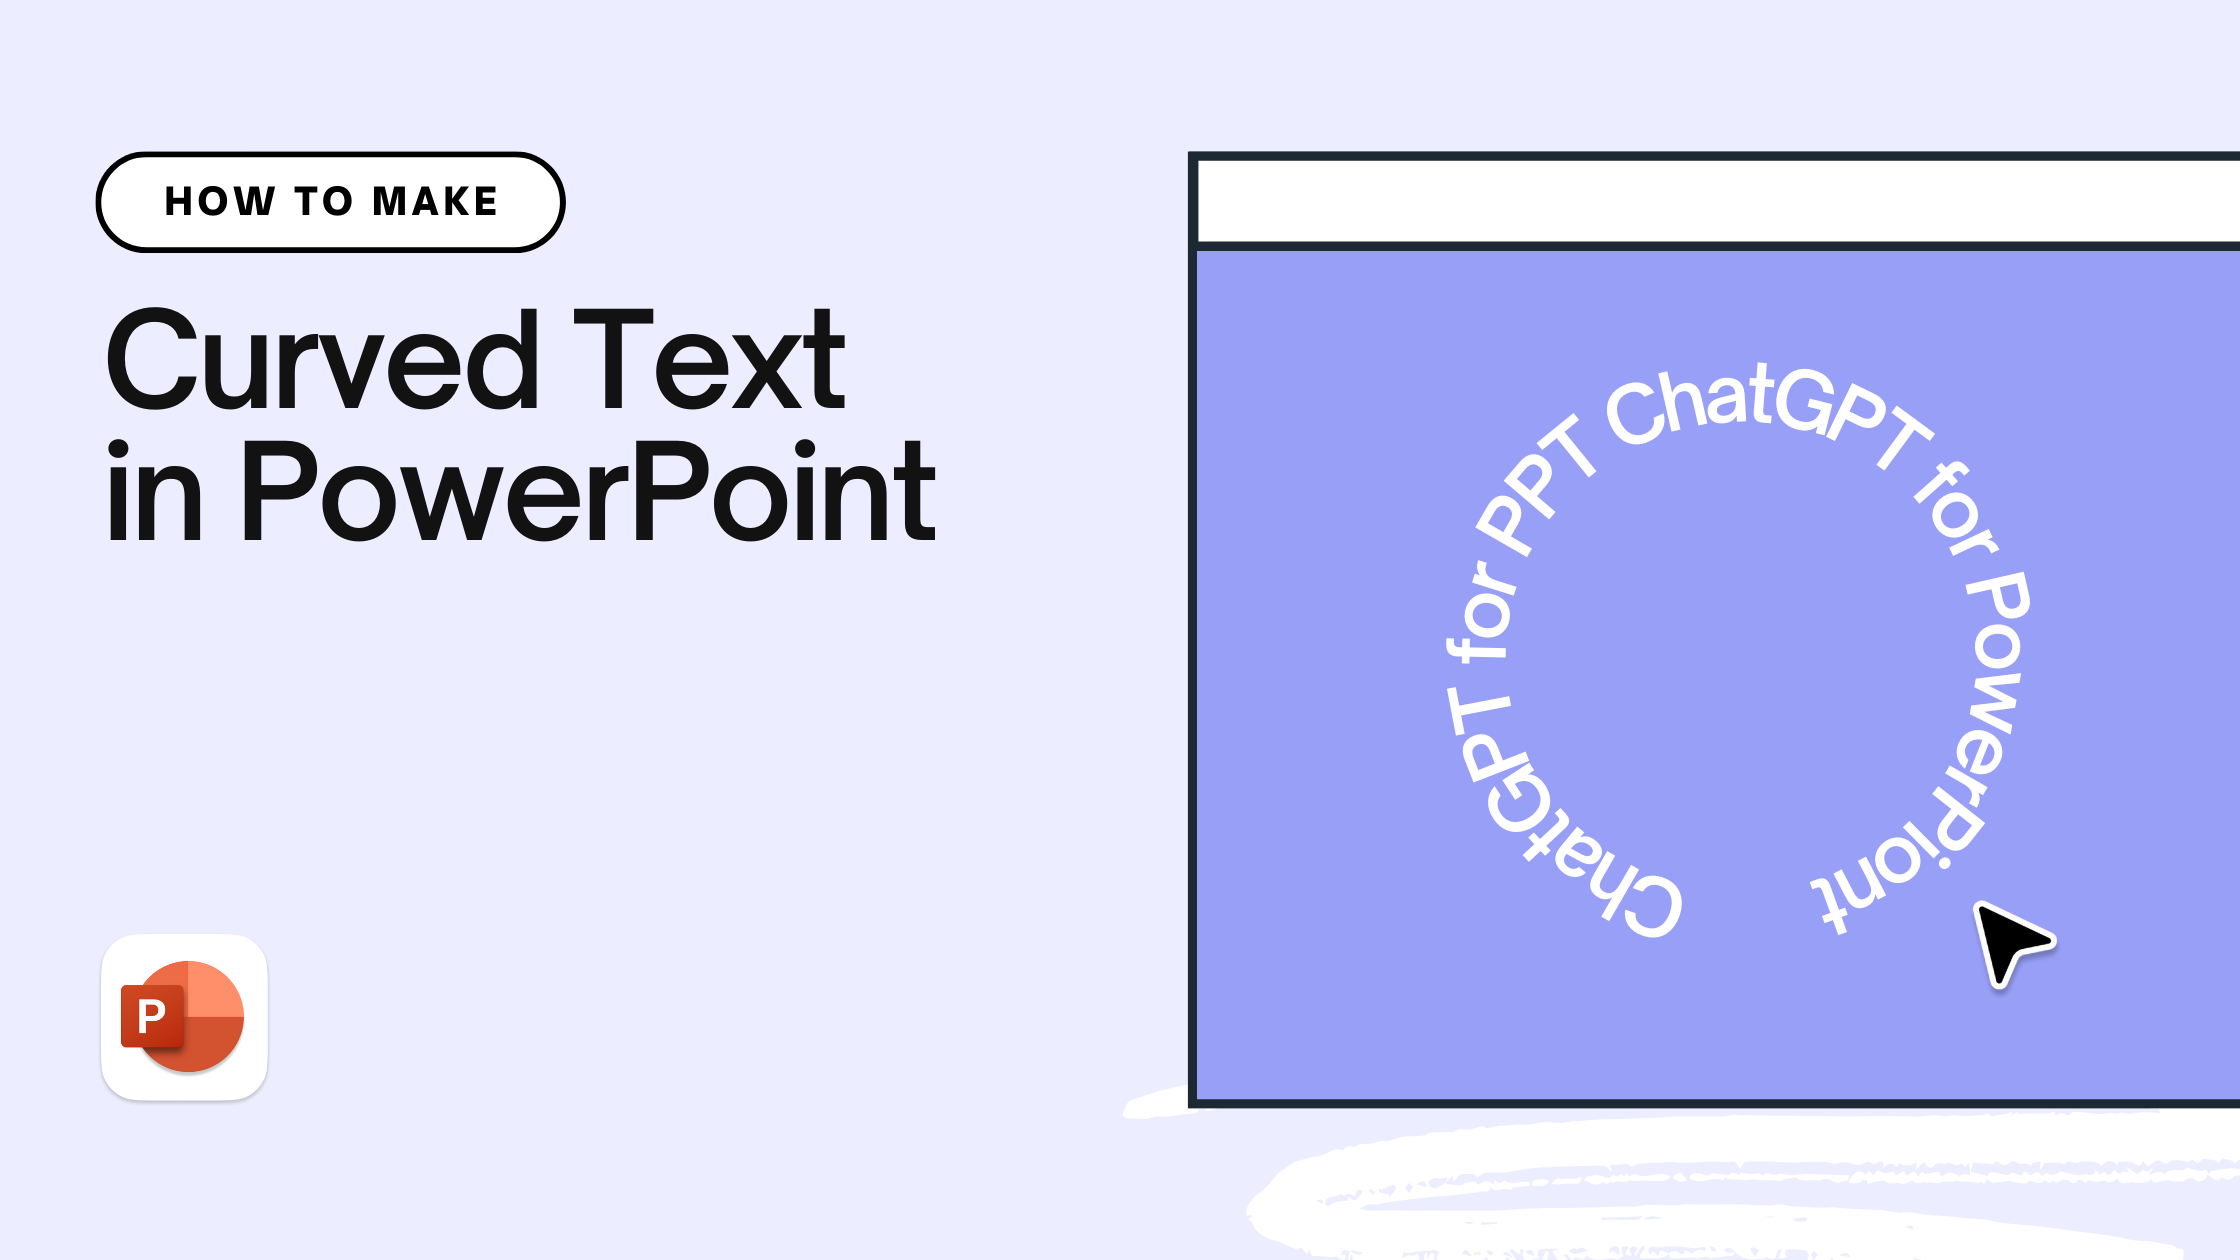
Design elements and unique visuals in a presentation grab viewers’ attention and add aesthetic value to the information. How to make curved text in PowerPoint to make the presentation even more engaging?
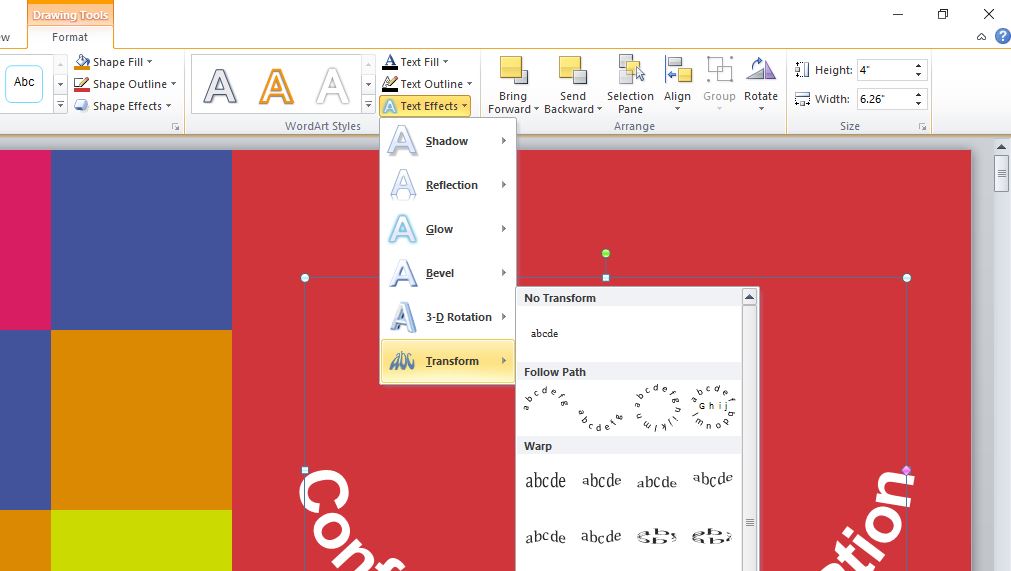
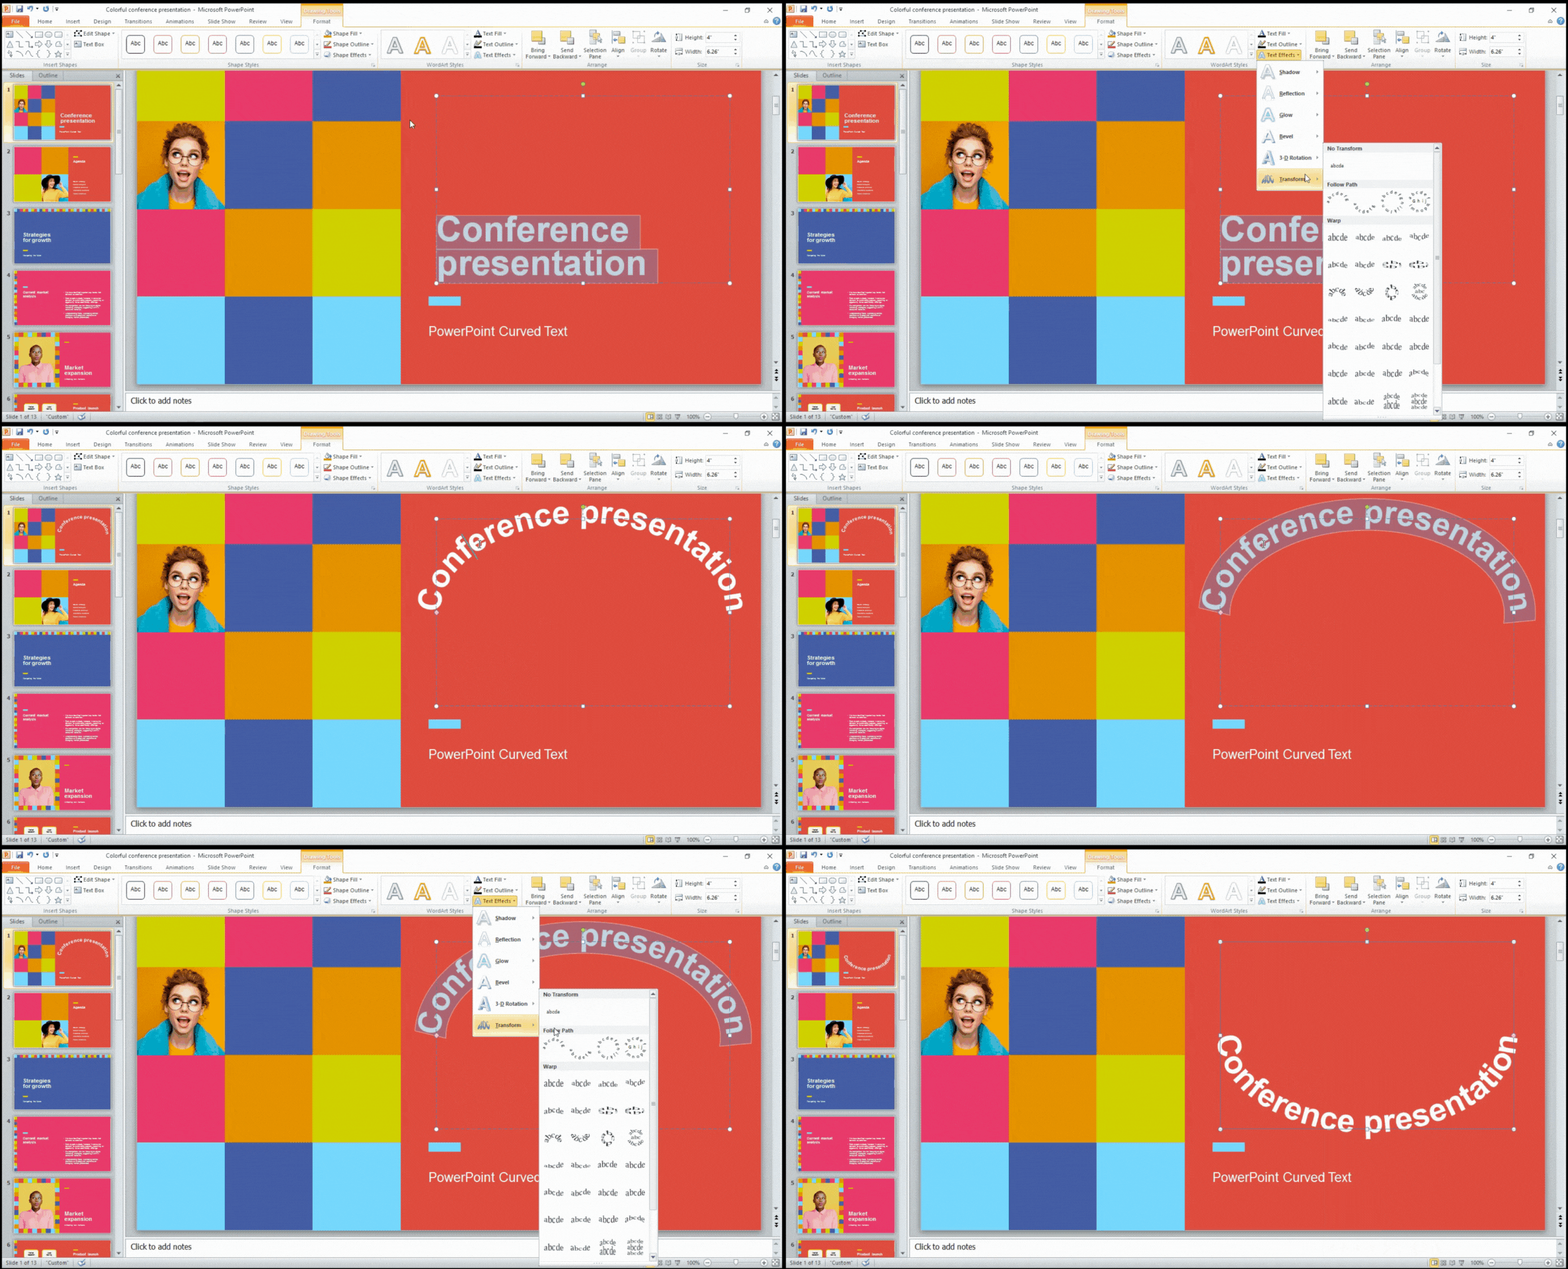
With no additional tool, PowerPoint offers a built-in solution to curve any text around a specific area or shape. The simplest way to make a text box curved in PowerPoint is to select the text >> Format (Drawing Tools) >> Text Effects >> Transform >> Follow Path >> Choose style.
Drawing tools offer unlimited creative design elements to enhance data and text presentations. Do you want to see the curved text styling in action? The next sections cover a step-by-step guide for creating curved text in PowerPoint and what else you need to know about this feature.
Enhance Visual Appeal with Curved Text
Whether you are creating a class presentation or pitching a great professional idea to investors, the human brain processes visuals significantly faster than text. Curved text combines the power of visuals and text so that conveying information becomes more efficient.
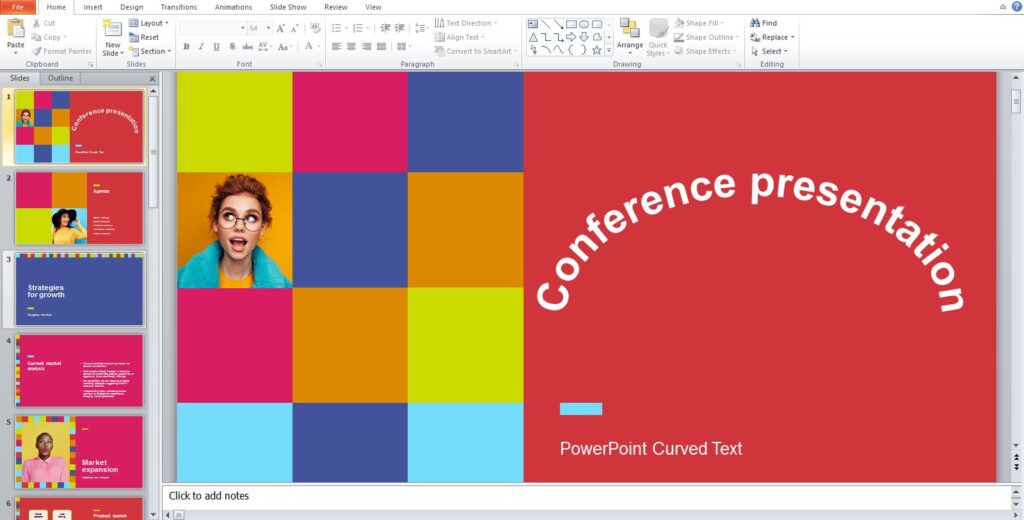
Always remember to be careful about text selection for curved text. With this feature, only the most important data, heading, or piece of content should be highlighted.
There are different style options available for users, including:
- Arch Up
- Arch Down
- Circle
- Button
Every style adds unique appeal to the data, and depending upon the theme of the presentation, you may incorporate any of these styles in your presentation. Your selected style for curving a text should not make information hard to read or clumsy. Stick with a simple yet elegant design approach.
Steps to Make Curved Text in PowerPoint
It does not matter which version of PowerPoint you have; the steps to curve text are almost the same. These steps are easy to follow and will let you style your text in any type of curved shape around a shape or path.
Step 1: Open the File and Select Text
Users can open any existing PowerPoint file or create a new one from scratch to style a text. Select the text that needs styling or you can also write new text to make it curved.
Step 2: Go to Format Tab (Drawing Tools)
You have selected the text and a new option “Format” will appear on the top menu. In some older versions, Format option was part of the Drawing Tools.

Step 3: Text Effects >> Transform
In the Format tab, there is “Text Effects” option in the center of the bar. Click on the “Text Effects” and choose “Transform”, last option from the dropdown menu.
Step 4: Apply Curve or any other Style
Here, you can apply the “Follow Path” option or “Wrap,” depending upon your style choices. There are unlimited ways to style a text.
Step 5: Be Creative, Try Possibilities
There is no need to stick to same Arch Up or Arch Down styles for curved text. Try different possibilities and see what suits the most while complimenting the existing theme of the presentation.
Step 6: Finalize, Apply, and Save Style
You can always change the font size, font family, and other elements of the selected text. The style options described in this guide are just to give you an idea. We highly recommend styling text to make your presentation unique and engaging. If a style does not suit your theme, try other options and make adjustments to make everything perfect.
When to Curve Text in PowerPoint?
The basic purpose of using curved text in any presentation is to make the selected text distinguished from the rest. A heading, fact, title, or announcement can be styled with curved text.
With pre-defined style options, there are still decent ways to make any text curve or wrap around any image or shape. Here are some potential use cases for curved text in PowerPoint.
Adding Dynamic Visually Appealing Titles
In business world, a presentation may include lots of data and information and presenter has to ensure that important points, titles and subheading easily grab the attention of the audience. By adding curved subtitles and headings, you can convey the important data in immersive ways.
Optimizing Image Placement on Slides
Images are critical component of presentations and they need to be large enough for the easy processing by readers. Adding text to a slide with image requires use of every possible space. Wrapping text around images not only optimizes the slide but also associates text to the relevant image.
Logos and Brand Identity
Custom PowerPoint templates allow users to add their logos as part of their brand identity. The curved text can be styled in different ways and colors to match the overall theme of your brand. Make sure to analyze the color scheme of your brand that is applied on other platforms and channels.
Fastest Way to Create Professional Presentation
PowerPoint is an amazing tool with unmatched powerful features. Most users don’t know how to use the true potential for their projects. At Apps Do Wonders, we have developed an AI-powered ChatGPT for PowerPoint Add-in. With no prior experience needed, this is true power show of AI for individual and professional use.
Create Easily, Present Wonderfully
See the magic of ChatGPT for PowerPoint — download from Microsoft AppSource for free today.
Try for free
Conclusion- How to make Curved Text in PowerPoint?
This guide has covered everything related to making a text curved in PowerPoint. If you have any queries in mind, don’t forget to browse through other useful resources on the site. It is better to choose a short sentence or word to wrap it or make it curved.
There is no hard and fast rule about when to make a text curved and how to use it. The application of the style elements is up to your creative side. Keep testing different styles and give this guide another read or focus on the added visuals to understand steps of making a text curved in PowerPoint.
Frequently asked questions
Start Making AI Presentations in Seconds
Instant Access
Begin exploring Twistly’s full suite of features immediately
No Commitments
No credit card required, and you can cancel anytime
Dedicated Support
Our team is here to assist you every step of the way during your trial.


