

How to Make a Decision Tree in PowerPoint?

PowerPoint presentations can also be used to evaluate strategic options, make decisions, and assess risks. Making a decision tree in PowerPoint can help you choose the best possible option. How to make a decision tree in PowerPoint? What’s the easiest way to make a decision tree for your slides?
In this article, we will explore a step-by-step guide on making a decision tree in PowerPoint. For our readers, we have an exclusive AI tool that can make decision trees and custom visuals within seconds. Stay with us till the last section of this guide; you won’t regret reading this one.
What is a Decision Tree in PowerPoint?
As the name suggests, a decision tree is a type of mind map that is a hierarchical model for decision support. Different choices and their possible results are shown in the form of a tree.
In simpler words, a decision tree is a flowchart-like diagram, representing a series of choices and their possible consequences. This is how a normal decision tree looks.
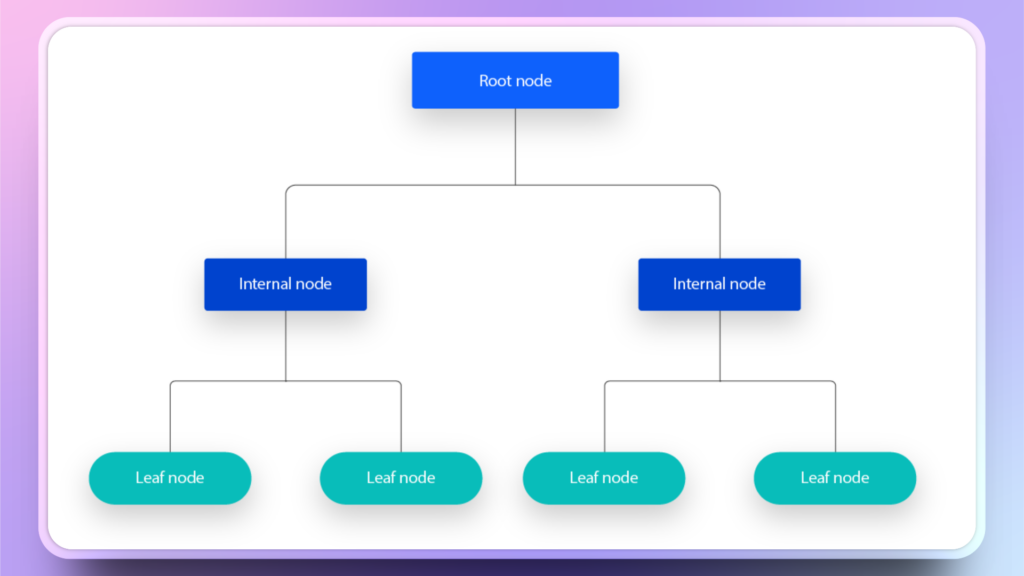
The choices and their consequences help users make logical decisions based on the available information. Generally, a decision tree consists of three major components, just like a real tree:
- The root, the starting point, or the initial choice or decision
- The branch, different options, and possibilities originating from the root
- The leaves offer further options based on the choices that you make
Making a Decision Tree in PowerPoint
PowerPoint has pre-designed graphics and templates that users can edit for custom decision trees. You can use different types of SmartArt elements for this purpose. In this guide, we will explain the simplest way to generate a basic decision tree in PowerPoint.
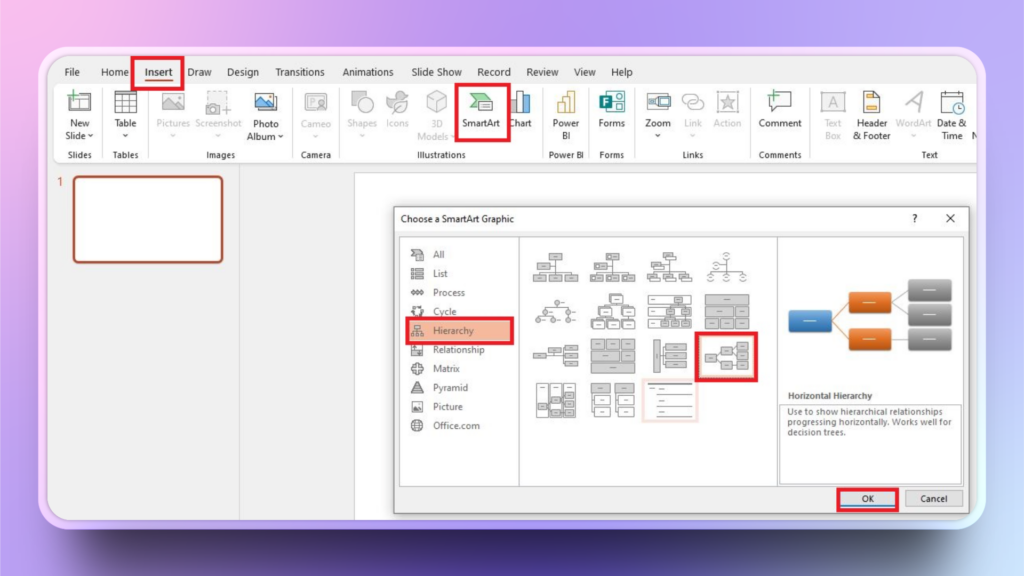
Step 1: Choose SmartArt from the Insert Tab
You can use any existing PowerPoint presentation or start a new one. We will use a blank slide for better understanding. Open your presentation, go to the Insert tab, and then choose the SmartArt option.
In SmartArt, choose the Hierarchy option and then select any of the diagrams that you like. We will choose Horizontal Hierarchy for this example and click OK to insert the diagram.
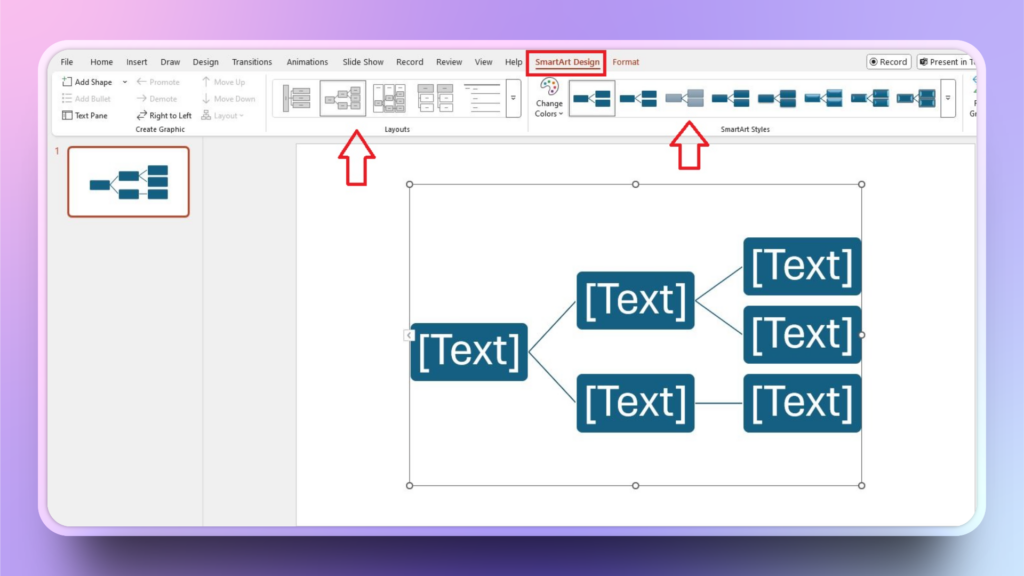
Step 2: Format SmartArt Diagram
You will see a generic diagram in your slide with dummy text and a few shapes, making a perfect decision tree. Go to the SmartArt Design tab and make changes to the shape or style.
Step 3: Add your Choices and Results
Now that we have the basic structure for the decision tree, it’s time to edit it for logical decision-making. Enter your data and available choices.

Click any shape and enter your custom data, and do the same for all available shapes. You need to be logical while entering data for roots, branches, and leaves.
Step 4: Add Shapes and More Options
If you want to add more options beyond the available shapes, right-click any shape and then choose “Add Shape” and select the placement of the new shape.
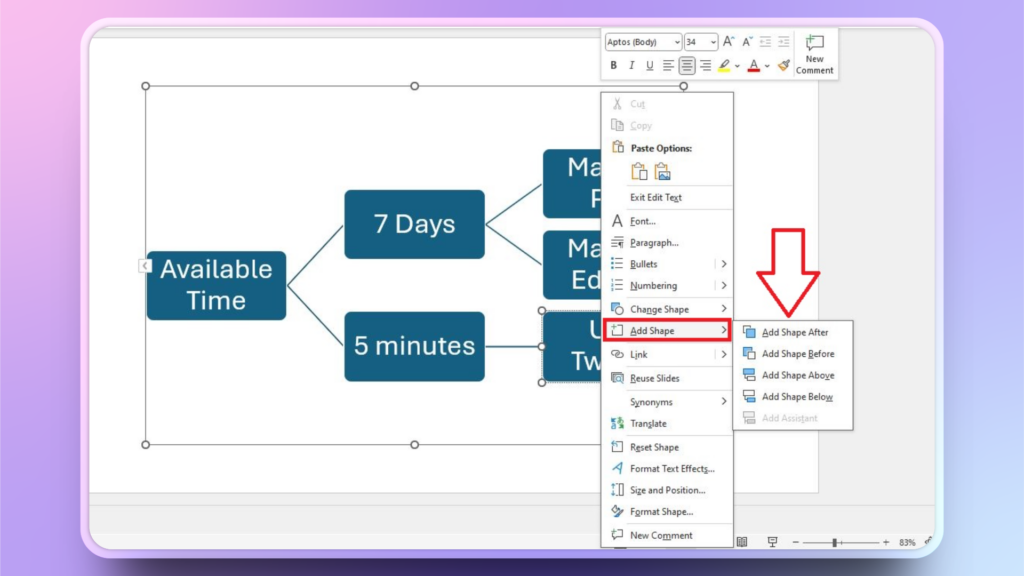
You can also add more shapes from the SmartArt Design tab >> Add Shape >> Select placement of new shape.
How to Make a Decision Tree with Twistly?
Manual methods to make decision trees offer flexibility, but they can also be quite complicated. If you want quick and easy solutions for such custom visuals, try Twistly. This AI-powered add-in for PowerPoint suggests the best possible elements based on the contents of the presentation.
Steps to Create a Decision Tree with AI
Let’s assume you want a normal decision tree diagram but don’t want to spend time on manual editing and formatting. Twistly can do it for you in a few simple steps. Here is how to make a decision tree in PowerPoint with AI.
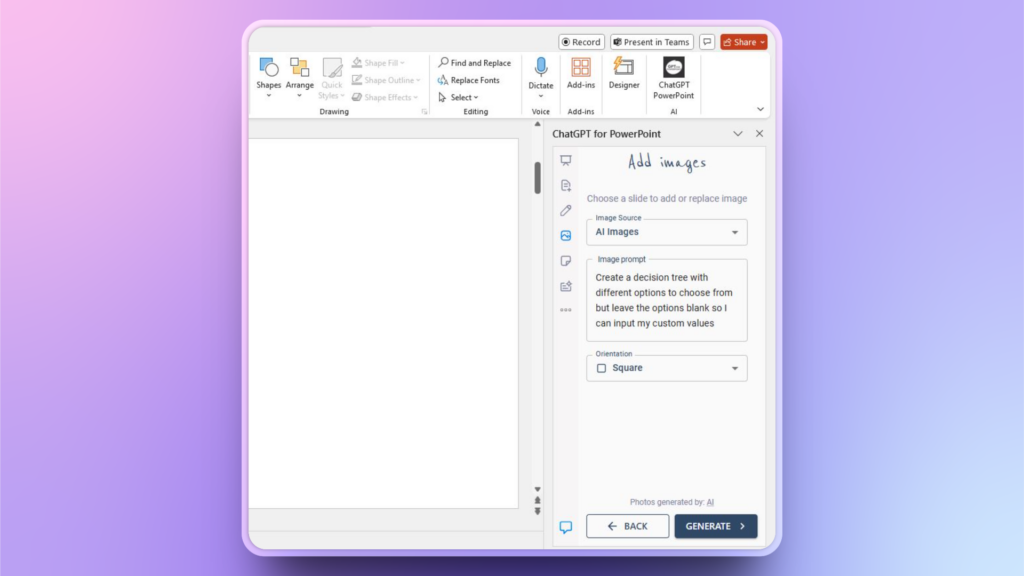
Step 1: Add Image with Twistly
Open your PowerPoint presentation and launch Twistly. Navigate to the slide where you want to add a decision tree. Choose the 4th option in Twistly, “Add Image.”

Step 2: Generate an AI Image
Select an AI image as the image source, then explain your decision tree structure in simple words and choose the orientation of the image. Click the ” Generate button to get the images.
Step 3: Insert Decision Tree
Twistly will generate a few possible AI images for the prompt. Select any image that you like, click Insert, and your image will be inserted into the slide.
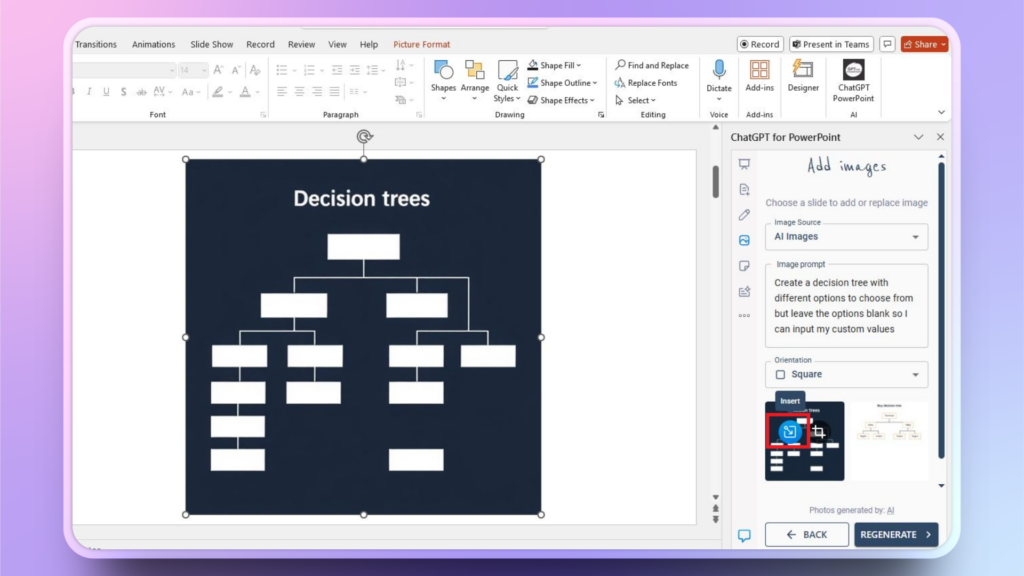
Now edit the decision tree with custom text or press the Regenerate button to get more possible images for your prompt.
Instead of following complicated steps, you can generate any type of shape, visual, or image inside PowerPoint with Twistly. It is a complete ChatGPT for PowerPoint.
Conclusion
How to make a decision tree in PowerPoint for logical decision-making? Choose Twistly for AI visuals or spend hours on manual editing. The choice is yours because if you don’t embrace AI now, others will, and you will be left behind.
Try the Twistly free trial version, and once you are convinced that Twistly can elevate your PowerPoint experience, upgrade to the premium version for a competitive price. Be productive and creative with Twistly for PowerPoint.
Create PowerPoint Slides with AI
Build AI-powered presentations from any prompt, doc, or video


Start Making AI Presentations in Seconds
Instant Access
Begin exploring Twistly’s full suite of features immediately
No Commitments
No credit card required, and you can cancel anytime
Dedicated Support
Our team is here to assist you every step of the way during your trial.