

How to Make a Curved Arrow in PowerPoint?

PowerPoint is a complete presentation software with unlimited design opportunities. Today, online resources have made it easier for users to find different visual elements and custom shapes. Do you know how to make a curved arrow in PowerPoint without using additional resources?
Yes, PowerPoint has built-in tools and options to make curved arrows and other custom shapes and icons inside PowerPoint. In this guide, we will discuss the easiest ways to make a curved arrow of any size or shape in PowerPoint.
Making Curved Arrows in PowerPoint
There are different ways and methods to make arrows and relevant shapes for PowerPoint slides. The level of customization is different for every method. Users can try these methods to make curved arrows in PowerPoint slides and make further changes as needed.
We will start with the easiest methods on how to make a curved arrow in PowerPoint. These custom arrows can be used in custom designs for PPT slides.
Method 1: Use Curved Arrow Shapes
This is probably the easiest way to add curved arrows in PowerPoint. In the Shapes section, PowerPoint has provided ready-made shapes, including curved arrows that users can easily use as per the PowerPoint presentation design. Here are the steps on how to make a curved arrow in PowerPoint using shapes.
Step 1: Open your presentation, go to the slide where you want to add curved arrows, and go to the Insert tab. Then go to the Shapes section >> Block Arrows and choose any arrow of your choice.
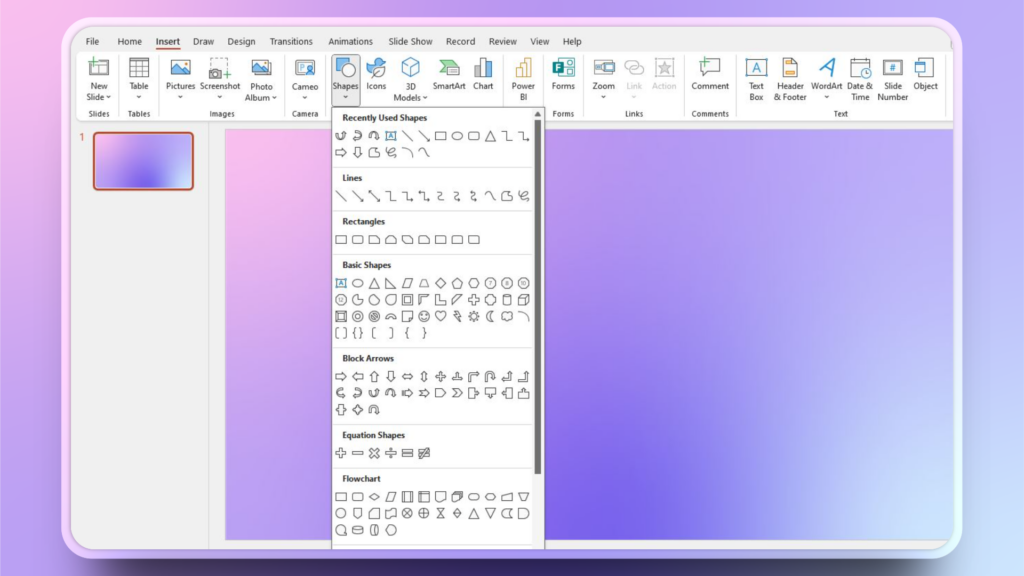
Step 2: Choose any arrow shape from the block arrows section and draw on your slide. You can adjust the size of the arrow while or after drawing. This is how a curved arrow from shapes is supposed to look in your slide.
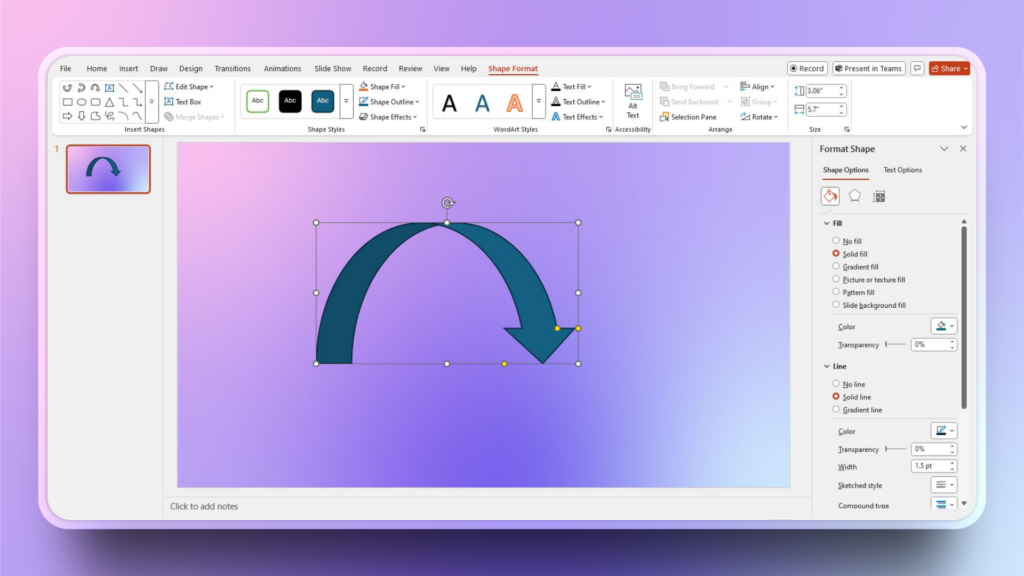
You can also change color, size, transparency, and other aspects of the curved arrow from the Shape Format section, as indicated in the above image.
Step 3: Multiple curved arrows with different directions can be added to the slide. Select the arrow and drag the controls to resize the object or rotate according to your design requirements.
Method 2: Use Icons to Make Curved Arrows
Another easy way to make curved arrows in PowerPoint is to use the “Icons” option. Users have many icons available for slide designs. Icons are improved versions of shapes, having special meaning and use for certain cases and tasks.
Follow these simple steps to add curved arrows in PowerPoint by using icons from the Insert tab. The user interface to search for Icons might be slightly different for older versions of PowerPoint.
Step 1: Navigate to the slide where you want to add curved arrows >> go to the Insert tab >> click the Icons button.
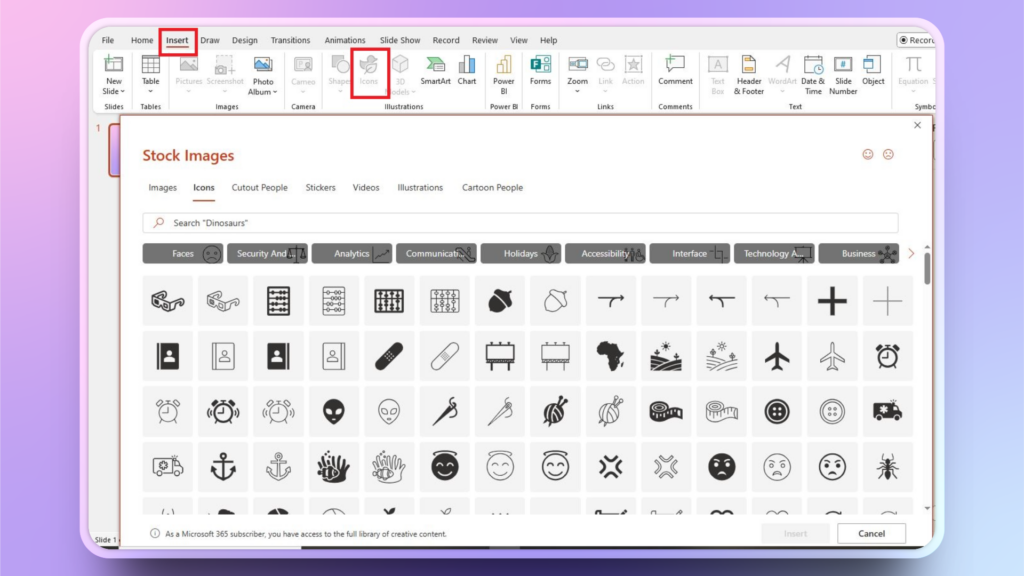
New windows will appear with lots of icons available for your PowerPoint presentation.
Step 2: In the search bar, search for “arrow,” and different icons will appear. From the search results, choose the curved arrows that you want, and press Insert. You can choose multiple icons at the same time.
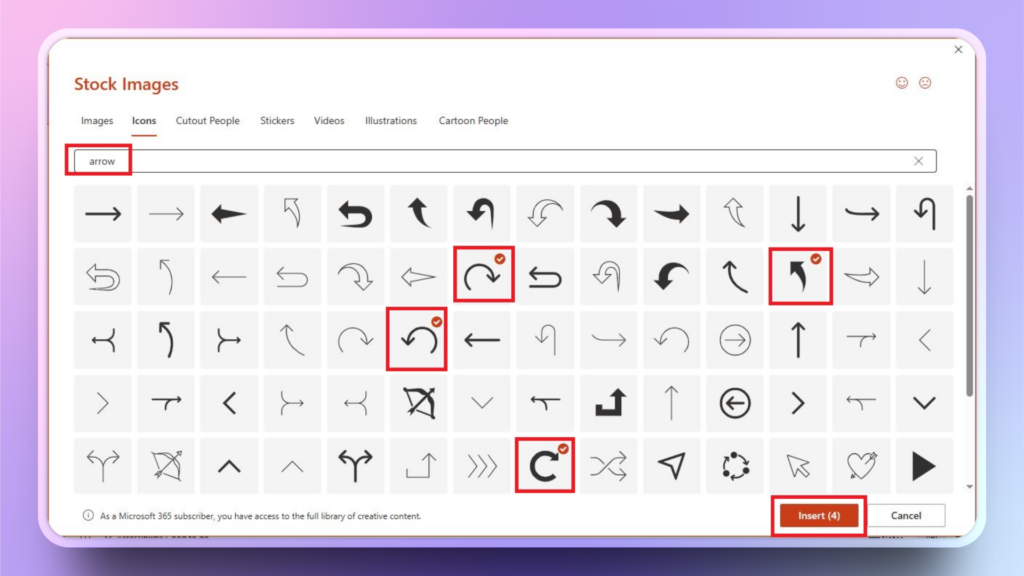
Step 3: You have selected curved arrows in your slide that you can edit and manipulate by using the Shape Format tab. Arrange these icons as you want, resize them, or change colors.

Method 3: Make a Curved Arrow using an Arc Shape
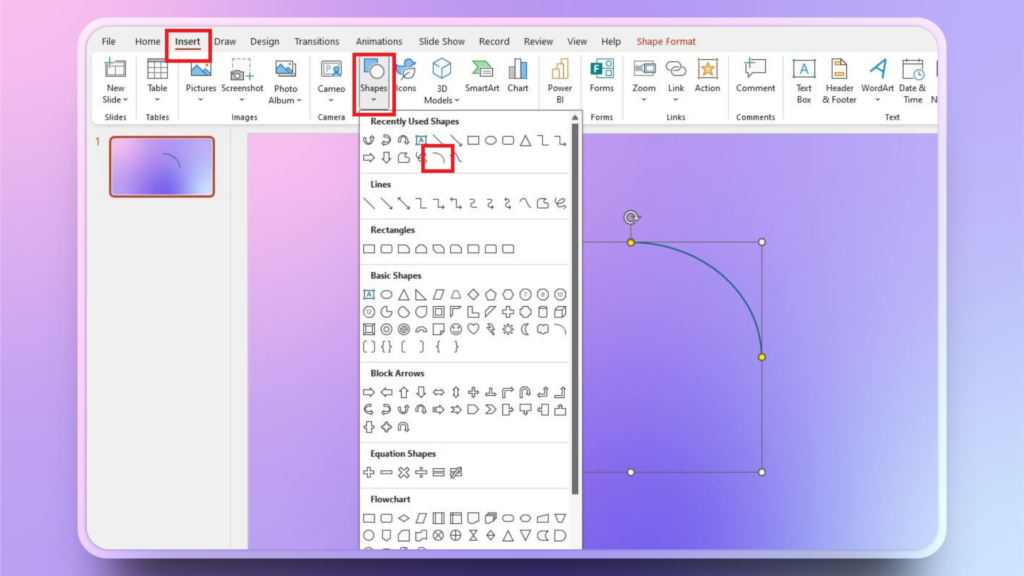
Do you want more flexibility for curved arrows? Using an Arc shape from the Shapes section offers a more flexible way to add curved arrows with lots of customization options. Follow these steps to make curved arrows with an Arc shape.
Step 1: Go to the Insert tab >> Shapes >> Arc and then draw the arc on your slide. A thin arc will be drawn on the slide as shown in the picture.
We will convert this simple arc into a curved arrow of your choice. Let’s make it more prominent with arrowheads.
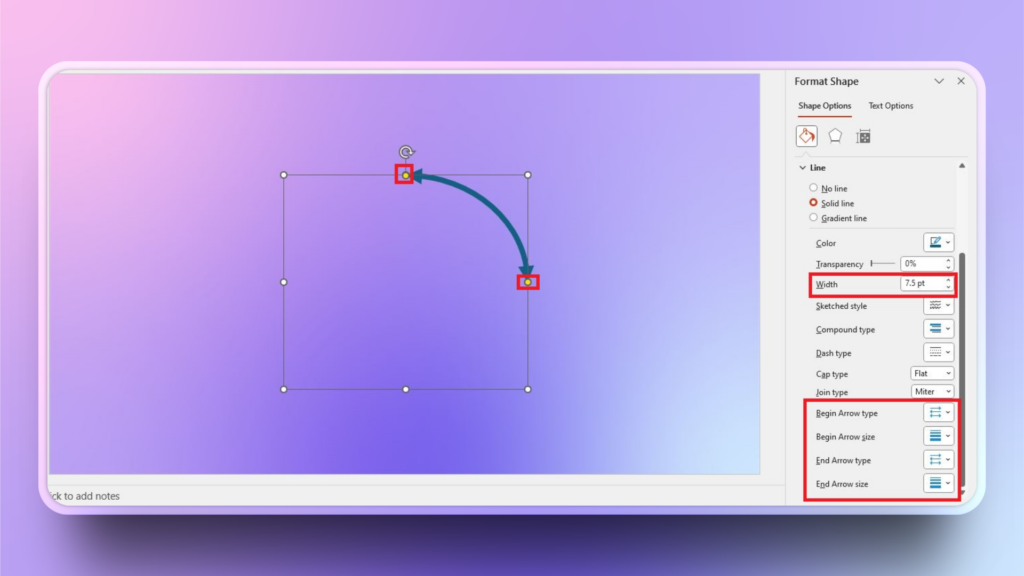
Step 2: Select the arc >> Shape Format and from the left pane, here are some possible edits that you can apply to make your curved arrow more visible.
- Select color
- Increase the width of the arc.
- Use “Begin Arrow Type” and “End Arrow Type” options to set arrows of different types on desired ends
- Set the arrow size by using the available option
Step 3: Hold the yellow dot from the start or end of the arrow and drag with the mouse to any side to increase the size of the arrow, turning the arrow into a more circular form.
Hold the border controls from any side to change the curvature of the arrow, and you can also rotate the arrow as needed.
Design Flawless PPT Slides with AI
Doing all of this seems easy, but it takes significant time. If you don’t want to spend hours on manual editing, AI can help you design amazing slides in PowerPoint. You can even add AI-generated images for your slides.
Create PowerPoint
Slides with AI
Build AI-powered presentations from
any prompt, doc, or video


How to Add Visuals with AI?
To integrate AI in PowerPoint, download the Twistly add-in from the PowerPoint add-in library. It is just like a custom ChatGPT for PowerPoint that you can use to generate professional slides by providing the topic of the presentation only.
Enter the topic or AI prompt in Twistly, and it will take care of the rest. No editing, formatting, writing, or styling is required to make presentations with Twistly. You just command it, and Twistly makes it happen with advanced AI engines.

Conclusion
These are the easiest solutions for how to make a curved arrow in PowerPoint. Choose manual designing or use Twistly for AI presentations. Don’t waste your precious time on boring presentations that you can easily turn into attractive PPT slides with Twistly.
Embrace AI for PowerPoint before it’s too late. A free trial version of Twistly is available for new users, so grab the deal at the most competitive price now. It’s time to elevate your PowerPoint presentations with Twistly.


Start Making AI Presentations in Seconds
Instant Access
Begin exploring Twistly’s full suite of features immediately
No Commitments
No credit card required, and you can cancel anytime
Dedicated Support
Our team is here to assist you every step of the way during your trial.