


Placeholders in PowerPoint: What They Are & How to Use Them
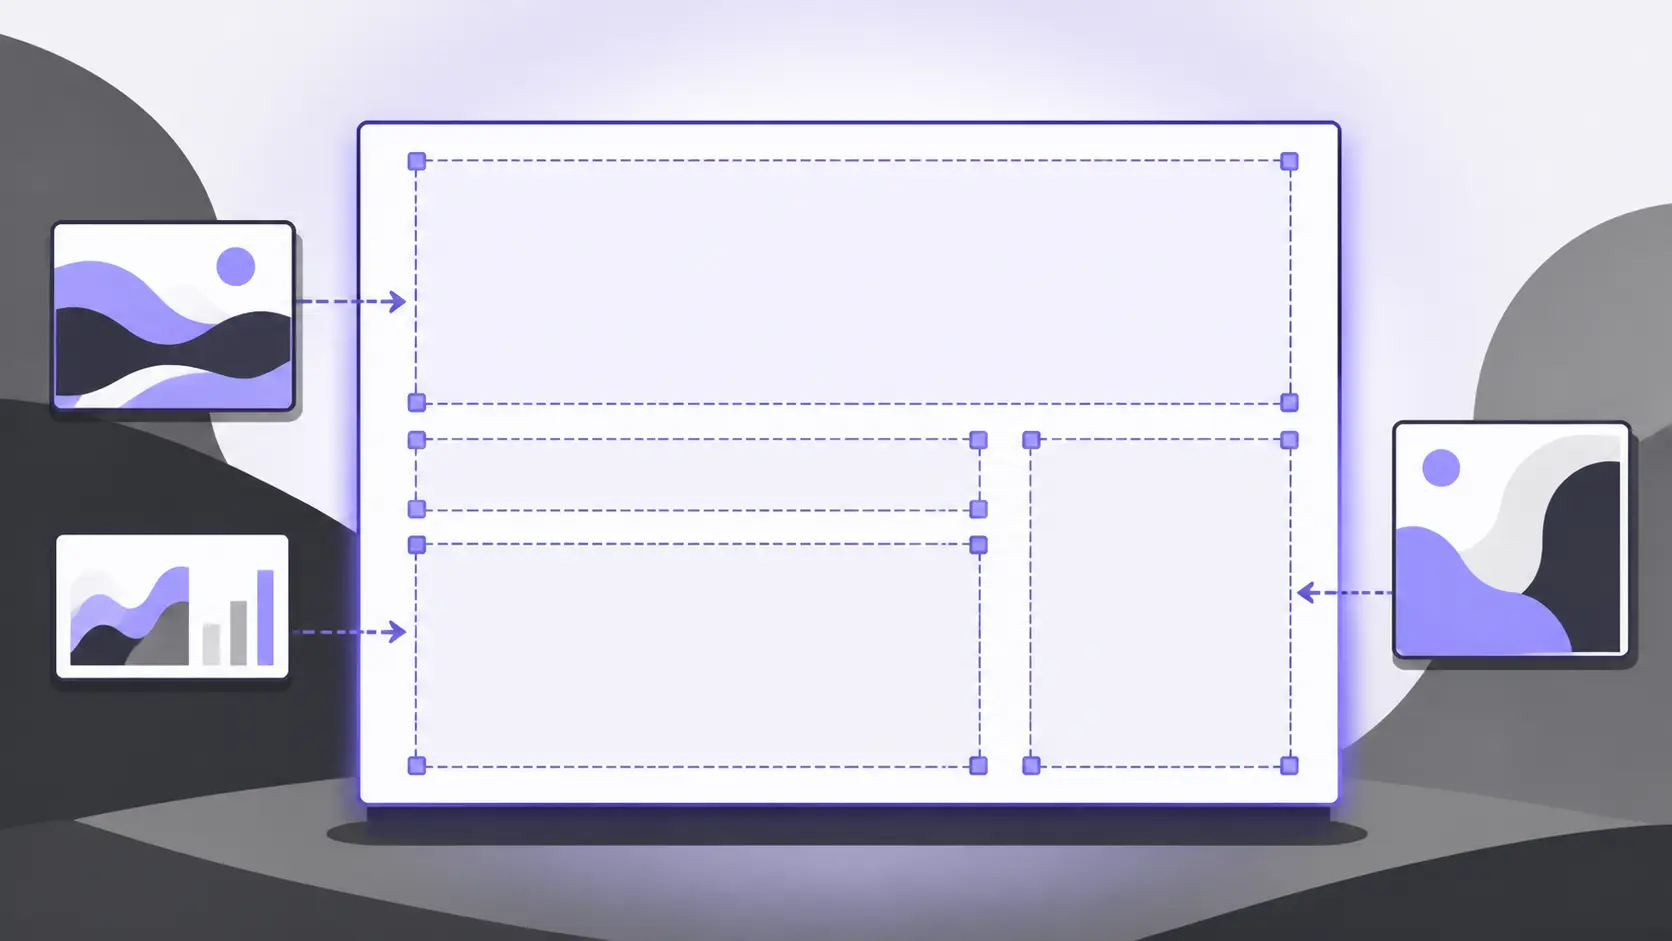
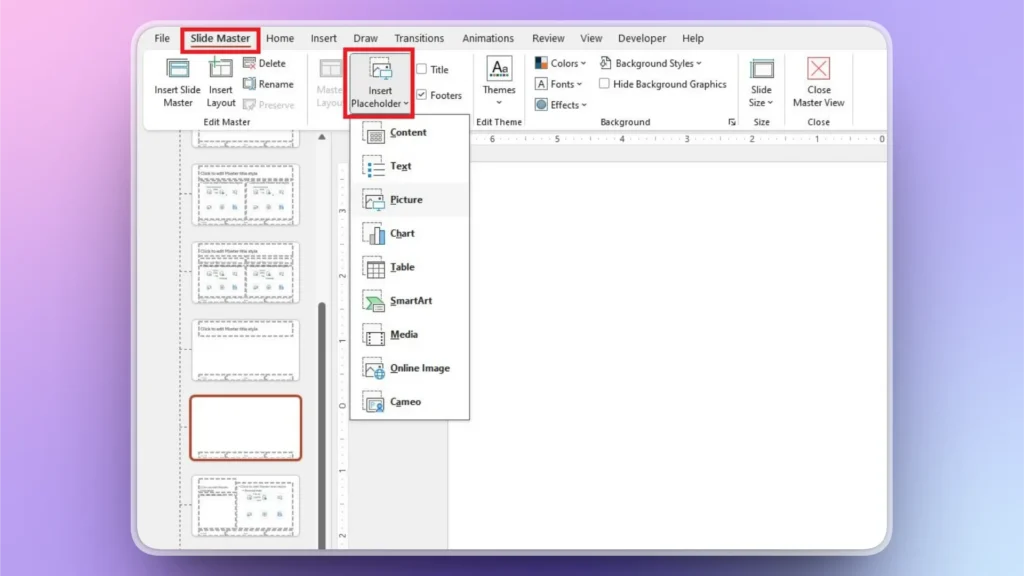
A placeholder in PowerPoint is a pre-formatted container on a slide where you can add text, images, charts, tables, and other content. To add a custom placeholder, go to View → Slide Master → Insert Placeholder, choose the type, and draw it on the slide.
Most users treat text boxes and placeholders as interchangeable — they are not. The difference affects formatting consistency, Outline View visibility, accessibility, and whether your content survives a layout change.
What Is a Placeholder in PowerPoint?
A placeholder is a container that is built into a slide layout, not placed manually on a single slide. It inherits font, size, color, and position rules from the Slide Master, so every slide that uses the same layout follows the same structure automatically. When you insert content into a placeholder — for example, dropping an image into a picture placeholder — PowerPoint formats, crops, and resizes that content to fit the container without manual adjustment. Placeholders are defined and managed through the Slide Master (View → Slide Master), which acts as the central design blueprint for your entire presentation. Any change you make to a placeholder in the Slide Master propagates to every slide that uses that layout.
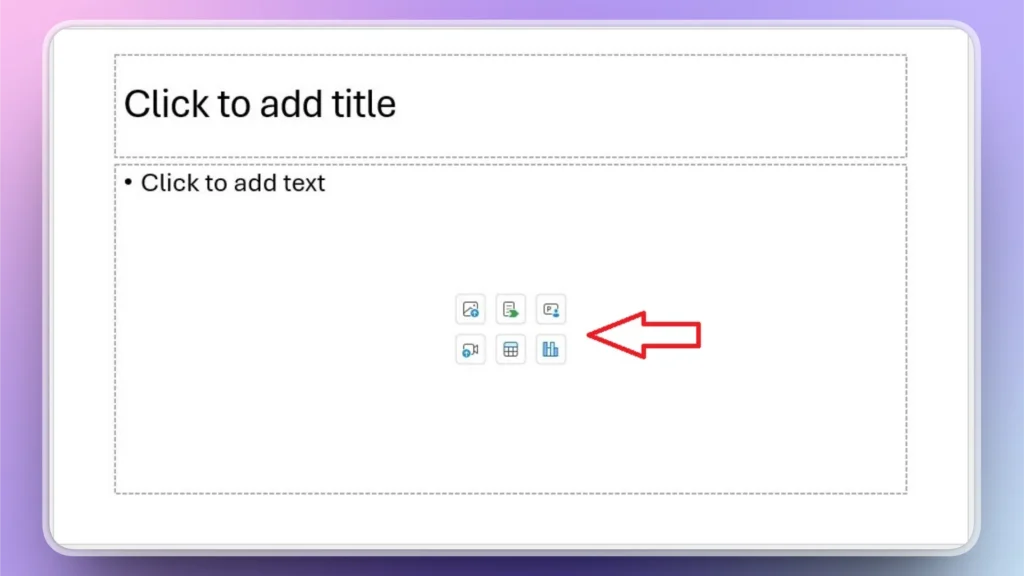
Placeholder vs Text Box: The Real Differences
Many users insert text boxes when they should be using placeholders. Both can hold text, but they behave very differently in four ways that matter.
Layout connection. A text box is a manual element you add through Insertar → Cuadro de texto. It exists only on the slide where you placed it and has no connection to the slide layout. A placeholder is part of the layout itself — it inherits formatting from the Slide Master, and when you update the master, every placeholder on every matching slide updates automatically. Text boxes stay unchanged.
Outline View visibility. This is the distinction most tutorials skip. Placeholder text appears in Outline View (View → Outline View); text box text does not. If you export your presentation as an outline, review it in Outline View, or use any tool that reads the presentation structure, text boxes are invisible. Only placeholder content is part of the presentation’s structural outline.
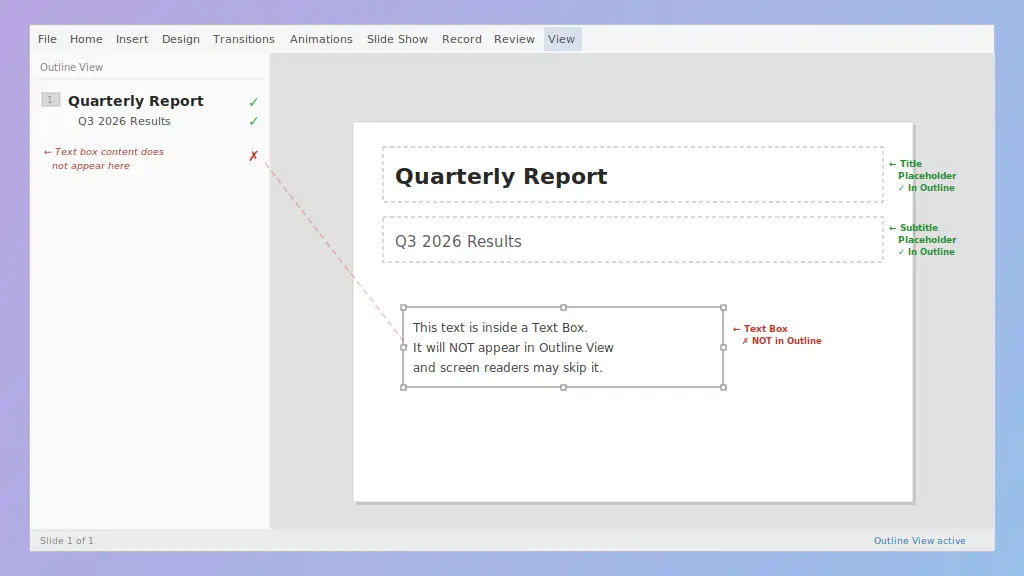
Accessibility and reading order. Screen readers process placeholders in the order defined by the slide layout — a predictable, designer-controlled sequence. Text boxes are read in creation order (z-order), which is often wrong and leads to a confusing experience for users with screen readers. For presentations that need to meet accessibility standards — in corporate, educational, or government contexts — placeholders are not optional.
Content types. Placeholders support multiple content types: text, images, charts, tables, SmartArt, and video. A text box holds only text.
When to use which: Use placeholders for any content that should follow a consistent layout across slides — titles, body text, images, charts. Use text boxes only for one-off annotations, labels, or callouts that intentionally sit outside the layout structure.
Types of Placeholders in PowerPoint
PowerPoint offers eight placeholder types through the Insert Placeholder menu in Slide Master view. Each one is designed for a specific kind of content.
| Placeholder | Descripción | When to use |
| Title | Holds the slide heading. Appears on almost every built-in layout except Blank. | Use for headings that must appear in Outline View. Only one Title placeholder is allowed per layout. |
| Contenido | The most versatile type. Accepts text, images, charts, SmartArt, tables, and video through icon buttons. | Default choice when you are not sure which type to pick, or when the slide may hold different content types. |
| Texto | Holds only text. Does not display content-type icons. | Use to restrict an area to text only — prevents collaborators from inserting images or charts into that space. |
| Fotografía | Accepts images only. Automatically crops and resizes to fill the container (Fill mode, not Fit). | Use for fixed-size image areas. Note: Fill crop may clip edges. Adjust manually after insertion if needed. |
| Gráfico | Opens the chart editor when clicked. | Use for data-driven layouts where the chart must be editable and tied to a data source. |
| Cuadro | Inserts a table with a prompted number of rows and columns. | Use when the layout requires a table in a fixed position and size. |
| Media | Holds video, audio, and other multimedia files. | Use for video or audio with consistent sizing across slides. |
| Online Image | Opens a search dialog for stock photos and online images. | Use when you want a built-in stock photo browser instead of a file picker. |
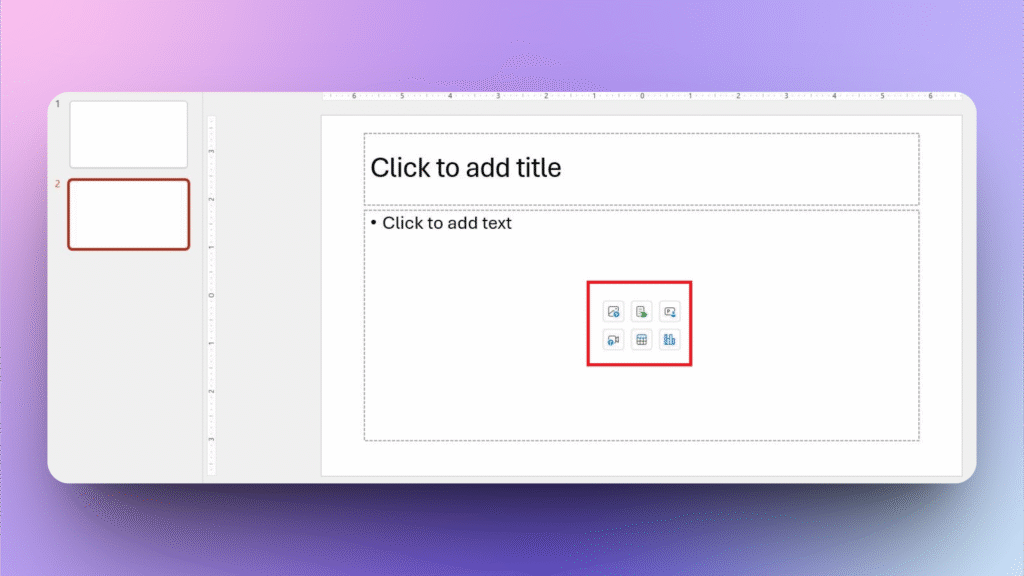
En Contenido placeholder is the most commonly used type because it acts as a universal container. When you see a placeholder with small icons for chart, table, image, and SmartArt in the center — that is a content placeholder.
PowerPoint also has built-in Footer, Date, and Slide Number placeholders. These are managed separately through Insert → Header & Footer and do not appear in the Insert Placeholder dropdown, but they are part of the layout system and follow the same Slide Master inheritance rules.
How to Add Placeholders in PowerPoint
There are two ways to get placeholders onto a slide: using predefined layouts or creating custom placeholders through the Slide Master.
Using Predefined Layouts
Every PowerPoint theme includes built-in slide layouts with pre-arranged placeholders. Click the New Slide dropdown in the Home tab, and PowerPoint shows thumbnails of every available layout for your current theme — for example, “Title Slide” has a title and subtitle placeholder, “Two Content” has a title and two side-by-side content placeholders. Click any layout to insert it. This is the fastest way to work with placeholders without opening the Slide Master.

Creating Custom Placeholders in Slide Master
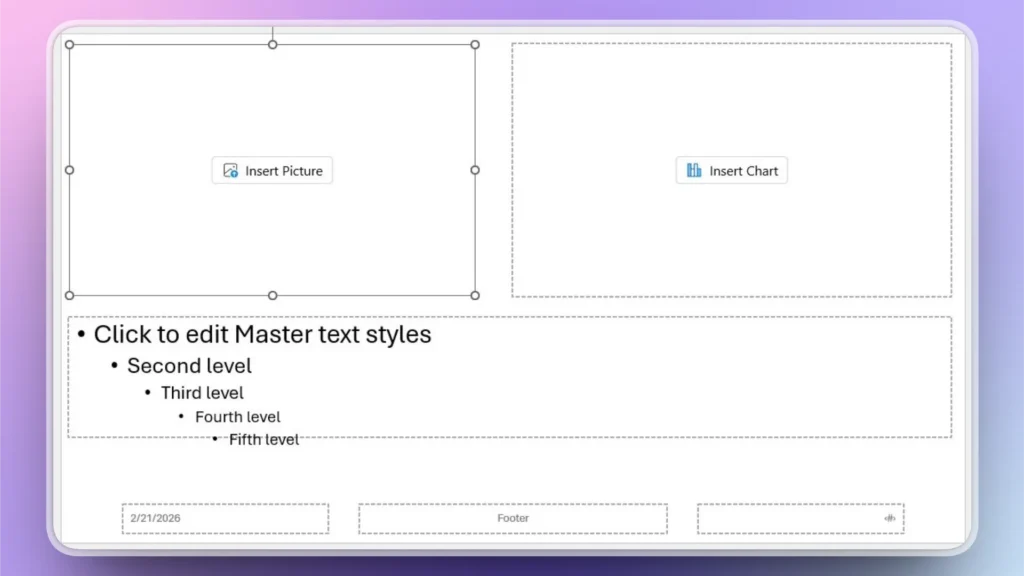
Use this method when you need a layout that does not exist in the default options — for example, a slide with one title, one picture placeholder on the left, and a chart placeholder on the right.
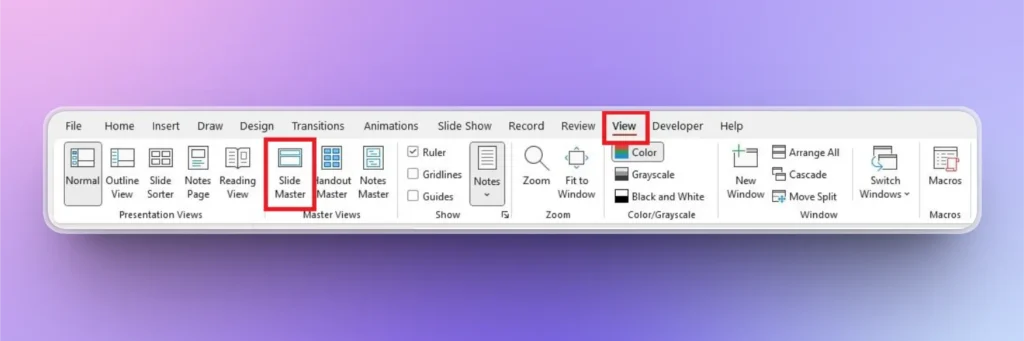
Step 1. Open your presentation, click the Ver tab, and click Patrón de diapositivas. The left panel shows the master slide at the top and all associated layouts below it.
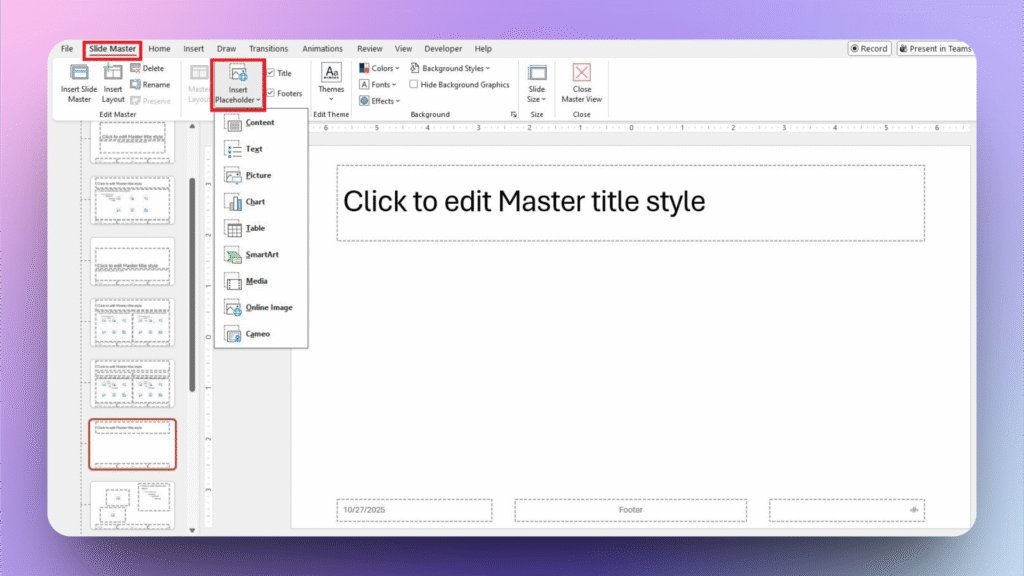
Step 2. In the left panel, select the layout you want to modify. You can edit an existing layout or right-click to insert a new one. Important: select a layout slide (indented, below the master), not the master slide itself — you can only insert custom placeholders on layout slides.
Haga clic en Insert Placeholder in the Slide Master tab and choose the type: Content, Text, Picture, Chart, Table, Media, or Online Image.
Step 3. Your cursor turns into a crosshair — click and drag on the slide to draw the placeholder. Resize it by dragging corner handles and reposition it by dragging from the center. You can add multiple placeholders of different types to the same layout.
Step 4. Haga clic en Cerrar Vista maestra in the Slide Master tab. Now, when you click New Slide in the Home tab, your custom layout appears in the layout list. Select it, and the slide with your custom placeholders is added to the presentation.
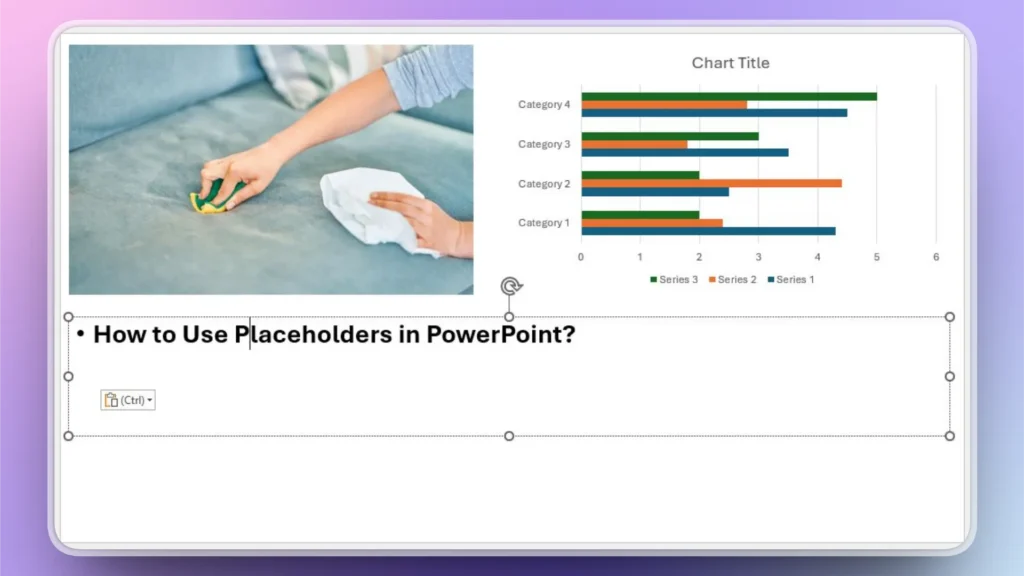
Three Constraints Most Tutorials Skip
One Title per layout. PowerPoint allows only one Title placeholder per slide layout. You can add as many Content, Text, or Picture placeholders as you need, but the Title slot is limited to one.
Existing slides need a manual reapply. When you modify a layout in Slide Master, new slides using that layout pick up the changes immediately. However, existing slides that already use the layout may not update visually — especially if you have manually moved or resized elements on those slides. To force the update: in Normal View, right-click the slide, select Diseño, and reselect the same layout. Alternatively, click Inicio → Reiniciar to snap everything back to the layout’s defined positions.
Desktop only. PowerPoint for the Web does not support editing the Slide Master or adding custom placeholders. You can use existing layouts in the web version, but custom layout creation requires the desktop application (Windows or Mac).
How to Edit Placeholders in PowerPoint
All placeholder editing is done through the Slide Master to keep changes consistent across your presentation.
Edit Prompt Text
The default prompt text says “Click to add title” or “Click to add text.” You can replace this with custom instructions that tell collaborators exactly what content belongs in each placeholder.
Ir a View → Slide Master and navigate to the layout with the placeholder you want to edit. Click inside the placeholder to select the prompt text, delete the default text, and type your custom prompt — for example, “Insert Q3 revenue chart here” or “Add team member photo.” Close the Slide Master. The custom prompt now appears whenever anyone uses that layout in Normal View.
This is especially useful for team templates: instead of a generic “Click to add text,” each placeholder tells the user exactly what goes there.
Resize and Reposition
Open the Slide Master and select the layout containing the placeholder. To resize, click the placeholder and drag any sizing handle. To reposition, click the border of the placeholder (not inside it) and drag it to the new location. Close the Slide Master — the new size and position apply to all slides that use this layout. The same reapply note from the previous section applies: existing slides may need a layout reapply or reset to reflect your changes.
Add Slides Without Manual Placeholder Setup
If configuring Slide Master layouts feels like overkill for your needs, Twistly generates complete, formatted slides from a text prompt directly inside PowerPoint — no manual placeholder setup, no Slide Master navigation. Free trial available.
PREGUNTAS FRECUENTES
Open the Slide Master (View → Slide Master), select the layout, click the placeholder border to select it, and press Borrar. This removes the placeholder from every slide that uses this layout. If you want to remove a placeholder from a single slide without affecting the layout, you cannot — placeholders are layout-level elements. Instead, leave the placeholder empty, or create a duplicate layout without that placeholder and assign it to the slide.
Each slide layout defines its own set of placeholders. When you switch a slide to a different layout, PowerPoint maps content from the old placeholders to the new ones by placeholder index — not by content type or visual position. If the new layout has fewer placeholders, content that does not have a matching placeholder may be moved to an unexpected position or hidden behind other elements. If the new layout has placeholders in a different order, content may end up in the wrong container (for example, a heading ending up in a body text area). To recover, undo the layout change (Ctrl+Z) or manually move the content to the correct placeholders in the new layout.











Empieza a hacer presentaciones con IA en segundos
Acceso instantáneo
Empieza a explorar inmediatamente todas las funciones de Twistly
Sin compromisos
No necesita tarjeta de crédito y puede cancelar en cualquier momento
Asistencia dedicada
Nuestro equipo está aquí para ayudarle en cada paso del camino durante su juicio.