

A timeline in PowerPoint is a handy feature for showing a project’s roadmap, company history, or project milestones. Users can add custom images with different timelines, but there is a better way to create a timeline in PowerPoint.
With different readymade timeline templates, PowerPoint has made it easier for users to create one and edit it according to the theme of the presentation. This topic might be complicated for some users, so we will keep it precise yet informative. Instead of making things too complicated for readers, let’s focus on creating a basic timeline.
Create a Timeline in PowerPoint
A timeline can include dates, tasks, steps, and other elements leading to the completion stage. For a project, a timeline might have dates with assigned tasks that must be completed within the due date.
For an educational project, the timeline can include important years in history. In simple words, you understand that the timeline shows different steps of a project.
Create a Basic Timeline
With different options available, we would like to start by creating a basic timeline in PowerPoint. Once you know the steps to create a timeline in PowerPoint, you can move forward with the complex ones. Follow these steps to create a basic timeline for your next presentation.
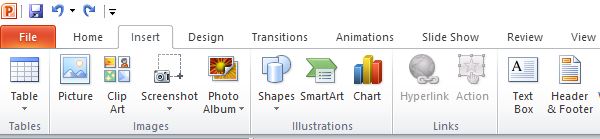
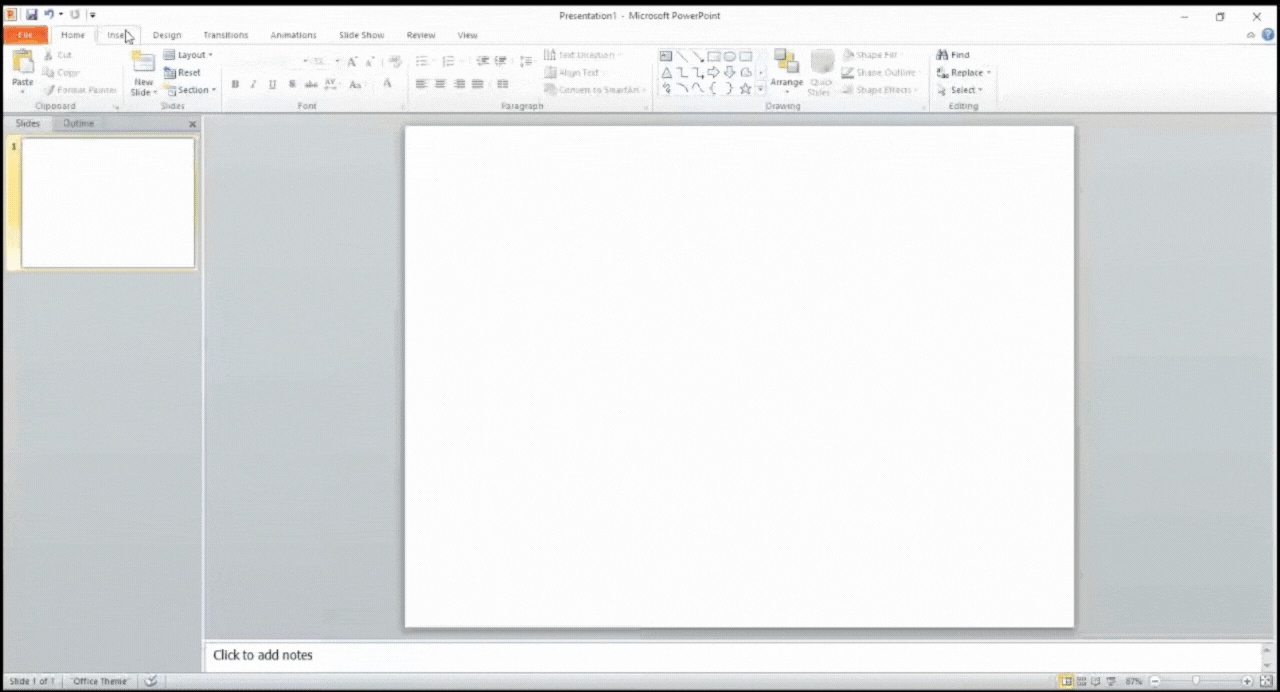
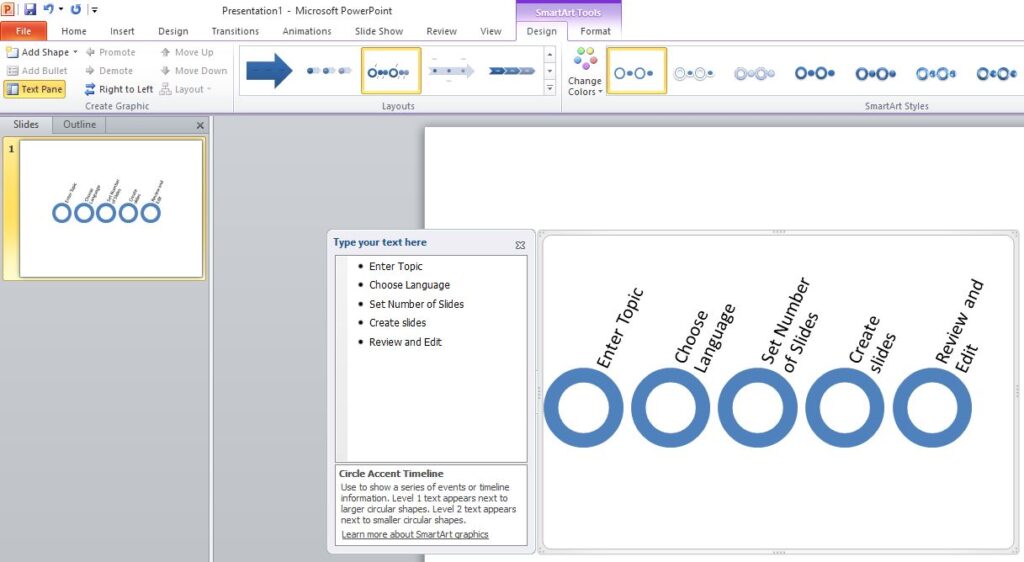
1- Go to the Insert tab and then click on the SmartArt option.
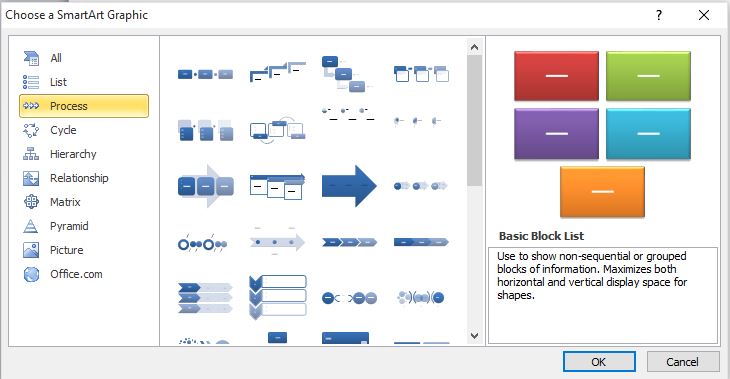
2- From the new window, click on the Process heading and basic timeline, as shown in the picture, and click OK. You can also choose other options.
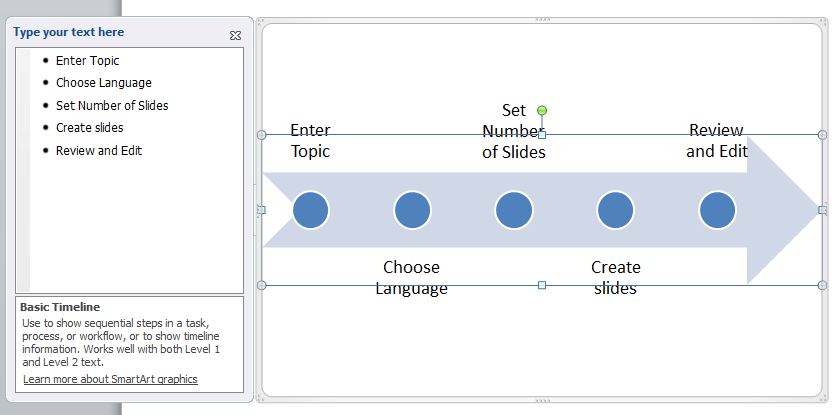
3- A basic arrow on the screen will have different headings and markings. The text for each step can be edited.
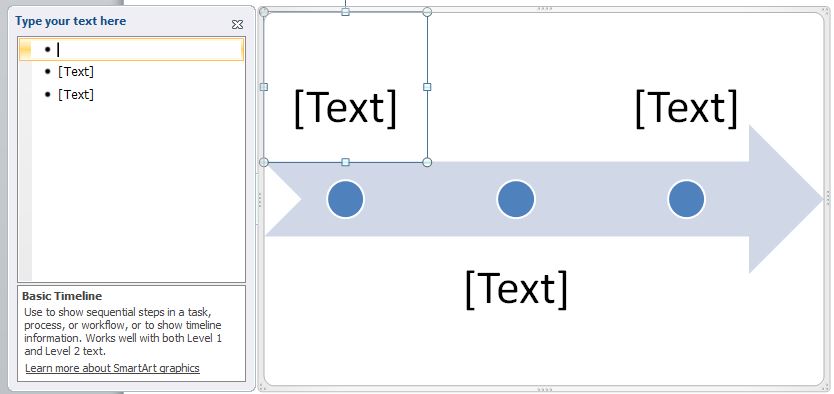
4- Steps or items for the timeline can be added directly on the arrow or using the text box on the left. Press enter after entering one item, and you can keep adding items like this.
Your basic timeline is complete. There are other ways to modify it with other items and details. Let’s see how to customize the timeline according to the theme of the presentation.
Add More Items to the Timeline
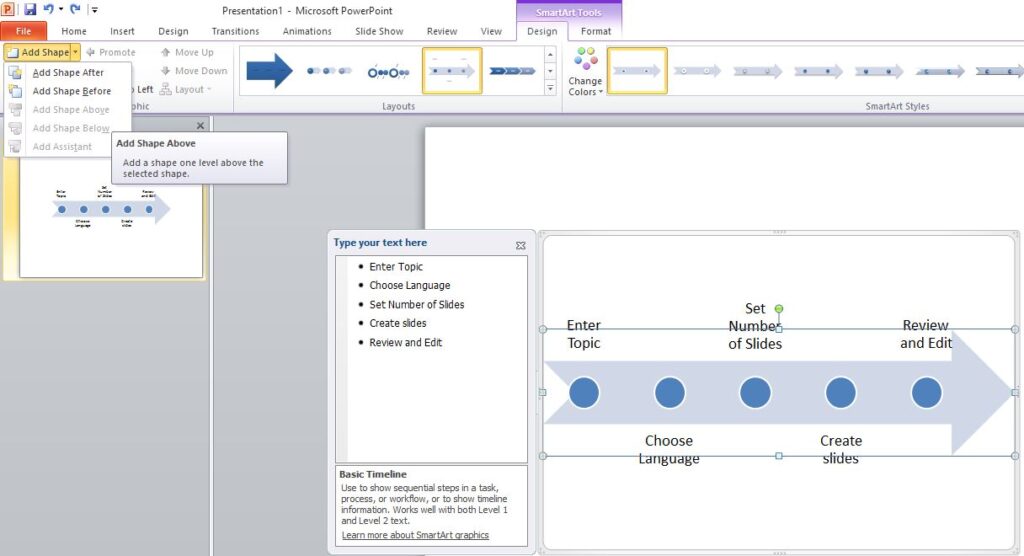
Adding a new text item directly on the timeline or in the left text box will add shape to the timeline. The other way to add shape to the timeline is to use the “Add Shape” option from the Design tab.
Click on any shape where you want to add shape, then choose any option from the Add Shape option.
Move Items in the Timeline
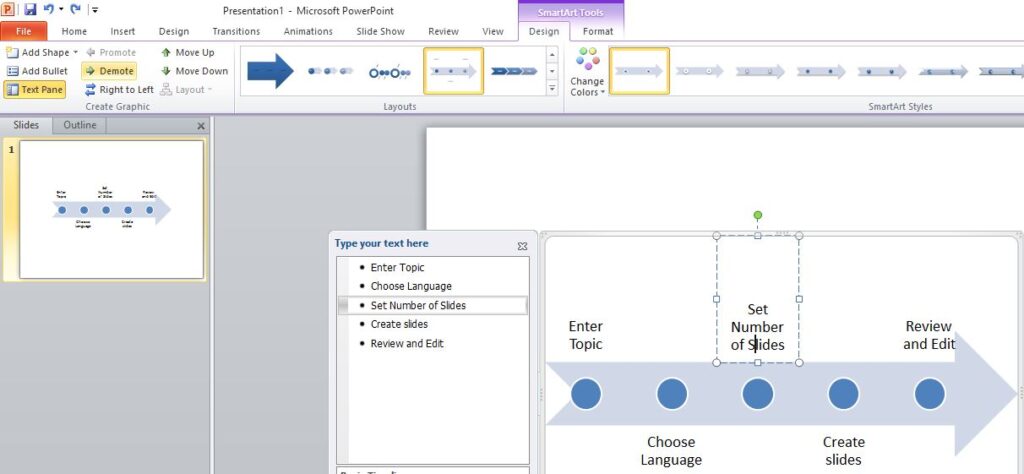
Do you want to move any step or item in the timeline? You might want to change the position of any step. Instead of manually editing all items, simply select the text or item from the timeline and then use the “Move Up and Move Down” options from the SmartArt Design tab.
Change Timeline Layout
Since we started with the basic timeline layout, you now know how to create a totally customizable timeline in PowerPoint. If you want to change the layout of the timeline, simply choose any other layout from the Layout section in the SmartArt Design tab.
Click on any layout, and the items on the timeline will automatically adjust according to it. Pick any layout that suits your theme.
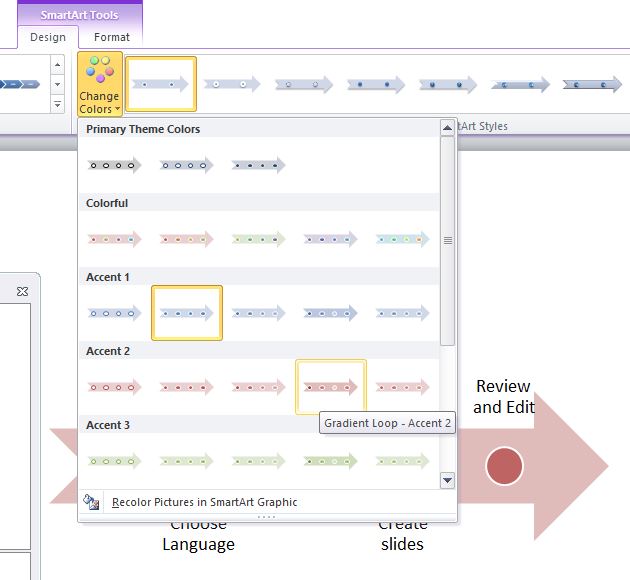
Change the Colors of the Timeline
The colors of the timeline are also customizable. If you are creative with design elements, you will find unlimited opportunities to edit and style different shapes in PowerPoint. Most users like to stick with the basic modes, but we want you to be good at presentation-making.
To change the colors of the timeline, click on the “Change Colors” button from the Design tab and try different color options.
The Easiest Way to Create a Timeline in PowerPoint
There are many other options that you might want to explore as per project requirements. This is the commonly used method to create a timeline in PowerPoint. Do you want a better and faster way to create and style slides in PowerPoint presentations?
Create Slides with AI Presentation Maker
With thousands of users already on board, would you like to improve productivity with ChatGPT for PowerPoint? This add-in can turn any topic into professional slides. Do you have a video with useful information and want to turn it into a presentation?
Input the YouTube video link in the text box, and advanced features of the AI add-in will identify important points, style the slides, and even add relevant images. If the slides require a timeline, this AI Presentation Maker will add a timeline automatically.
What else can you demand from such an amazing tool? Try it now for free and impress your audience with some immersive slides.
Create a Timeline in PowerPoint with AI.
ChatGPT for PowerPoint creates amazing slides and custom visuals— Get Add-in Microsoft AppSource for free today.
Try for free
Create a Timeline in PowerPoint- Final Words
The process of creating a timeline in PowerPoint is simple yet creative. It is better to use AI for presentations. Not everyone can spare hours to create slides for PowerPoint presentations. There is a lot to consider when finding images and selecting templates in conventional ways.
Frequently asked questions


Start Making AI Presentations in Seconds
Instant Access
Begin exploring Twistly’s full suite of features immediately
No Commitments
No credit card required, and you can cancel anytime
Dedicated Support
Our team is here to assist you every step of the way during your trial.