How to Create a PowerPoint Presentation Step by Step?
PowerPoint presentations are easy to create but giving them a professional and engaging look is the real challenge. If you are new to this software, it is easy to learn how to create a PowerPoint presentation step by step in a few minutes.
Presentations are an important part of life as a student, teacher, corporate employee, marketer, or any other field of life. Some of you might have to make presentations occasionally, while others deal with PowerPoint presentations daily.
Making a Basic PowerPoint Presentation
In this article, we will learn how to create a PowerPoint presentation step by step. Readers need to understand that we will cover the basic steps only. It is quite challenging to cover every possible aspect of making professional presentations.
PowerPoint presentations can have text, images, custom visuals, charts and graphics, datasets, videos, audios, and many other types of data and information. We won’t talk about how to optimize PPT slides for any specific niche or topic. This article is for beginners who have very little or no knowledge of PowerPoint presentations.
Steps to Create a PowerPoint Presentation
Let’s say you are asked to make a simple PowerPoint presentation on the topic “Best AI Tools in 2025.” This is a general topic, and users can easily find relevant data and information to cover this topic. So, let’s see how to create a PowerPoint presentation step by step.
Step 1: Gather Data for Presentation
You have the topic for the presentation, and the next step is to gather data and information for the slides. Try Google to find information about the best AI tools this year and identify credible resources from which you can collect data for the slides.
For better and optimized content, you can make a separate MS Word document or any other application to write ideas and data for the slides. Or you can simply copy and paste to the PowerPoint slides directly later on.
Step 2: Start a Blank Presentation
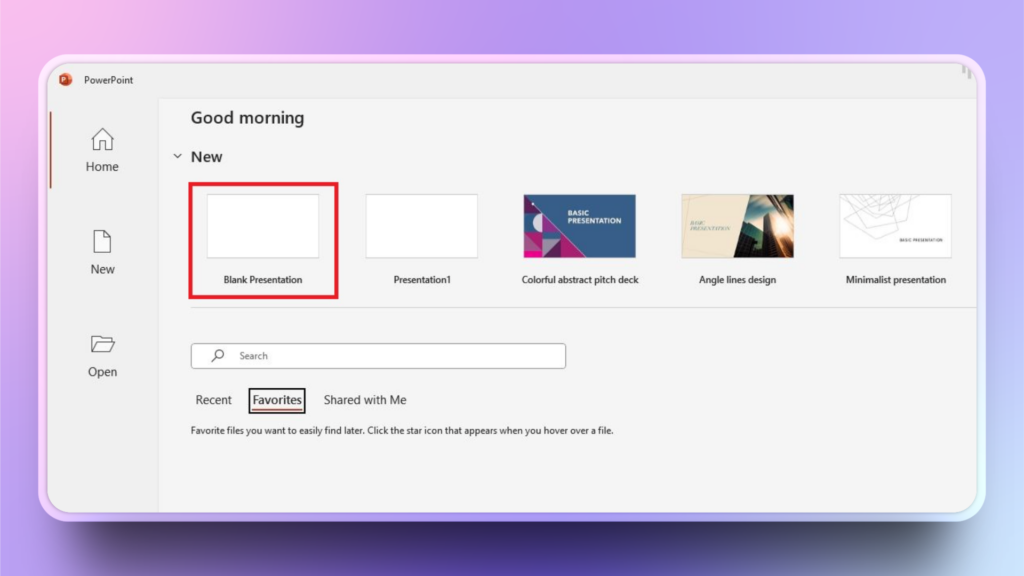
Open PowerPoint software on your device and start a blank presentation, or you can choose any presentation template as shown in the image below. Templates give you a clear layout to start your presentation instantly.
Step 3: Select a Design for Presentation
The easy way to start making a presentation is to select a premade design. Users don’t need to create everything from scratch. Readily available presentation designs offer a complete layout for the slides, and users can easily insert their custom content in these designs.
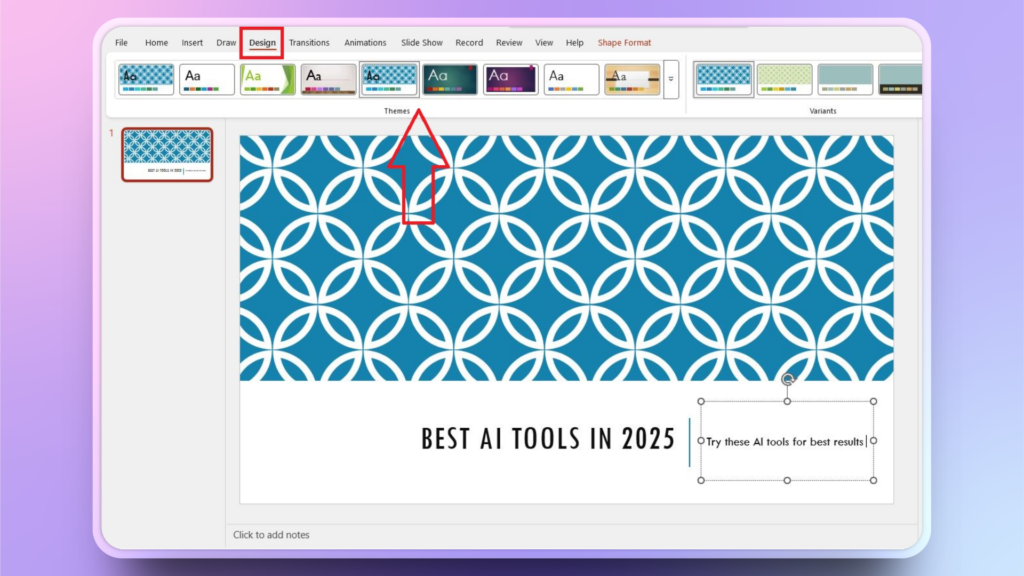
Now you have the basic layout for the presentation and a title page. Simply enter the presentation topic and subtitle in the given spaces.
Step 4: Add New Slide
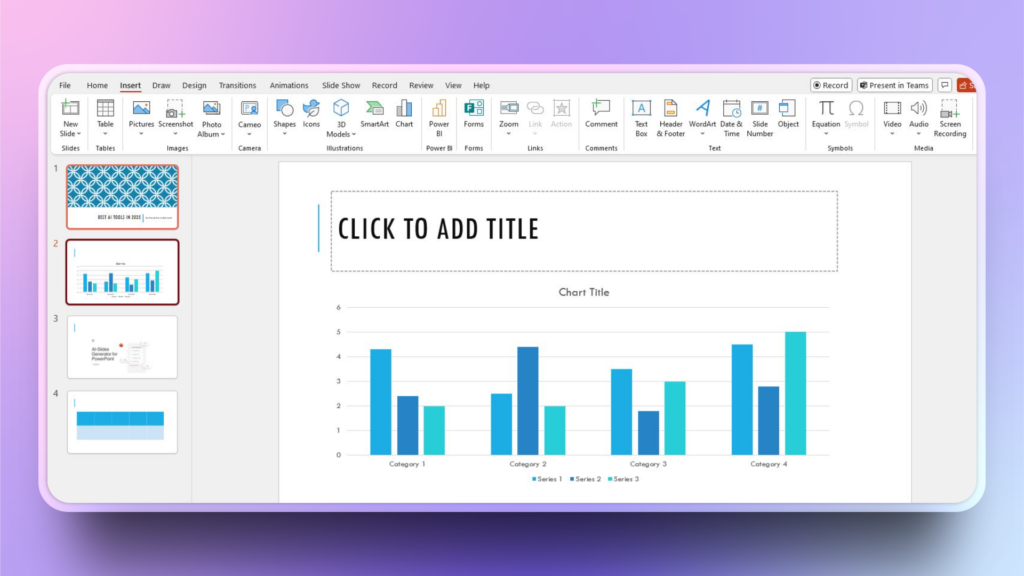
Once the presentation title page is ready, click the New Slide button, and a blank slide will appear with a basic layout and some options to insert elements quickly. You can use 6 icons to insert:
- Picture
- SmartArt Graphics
- Cameo
- Video
- Table
- Charts or graphs
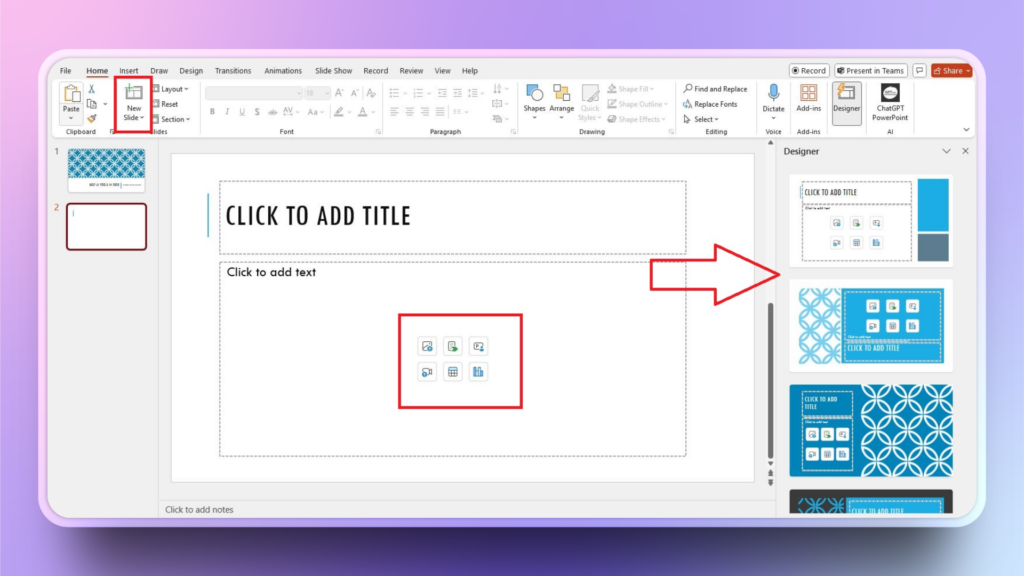
The pane on the right is a Designer tool that gives you design ideas for the slide. You can also click any design idea and quickly apply it to the slide.
Step 5: Add More Slides and Content
After completing one slide, add the next slide and add content to the slide. Make sure that you add only the most important data to the slide because too much data can make it hard for viewers to process information.
Step 6: Add Animations, Transitions, and other Elements
PowerPoint has different tools and features in the top ribbon that users can apply to the slides. Formatting slides for aesthetic appeal will take some time. Try different options and tools to find the right design ideas for your presentation.
Step 7: Review and Present your Presentation
After adding all available information, take some time to review the information and then go to the Slideshow tab and start presenting your slides. After some time, you will be able to make even better slides.
How to Make Professional Presentations with AI?
Let’s be honest, making professional and engaging presentation slides in PowerPoint takes time and design experience.
What if we could help you make professional presentation slides without any prior experience? Would you like to know how to make engaging presentations within minutes as a beginner?
Make Presentations with Twistly
Twistly is one of the most popular AI add-ins for PowerPoint that allows users to make engaging presentations within minutes, without any manual designing, editing, or writing.
It is just like ChatGPT for PowerPoint, where you just write the topic of the presentation, and Twistly does everything else.
Let’s create the same presentation on the same topic with Twistly. Here is how to create an attractive presentation with Twistly with no manual editing.
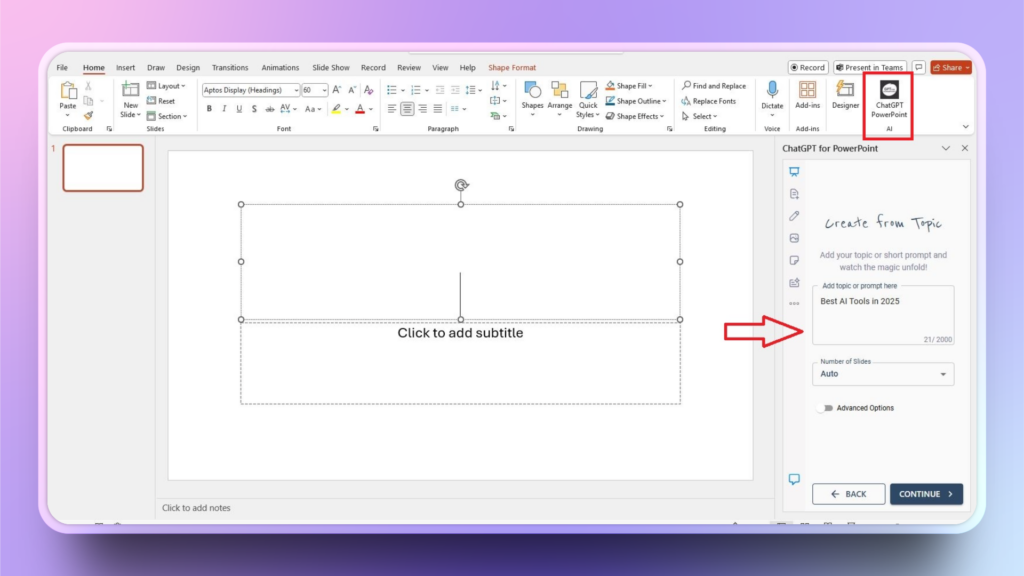
Step 1: Launch Twistly and Enter the Topic
Open PowerPoint and launch Twistly. Choose “Create from Topic” and enter the topic in the box as shown in the image. Select language, number of slides, and other advanced options. And click continue.
Step 2: Review the Slides and Select a Theme
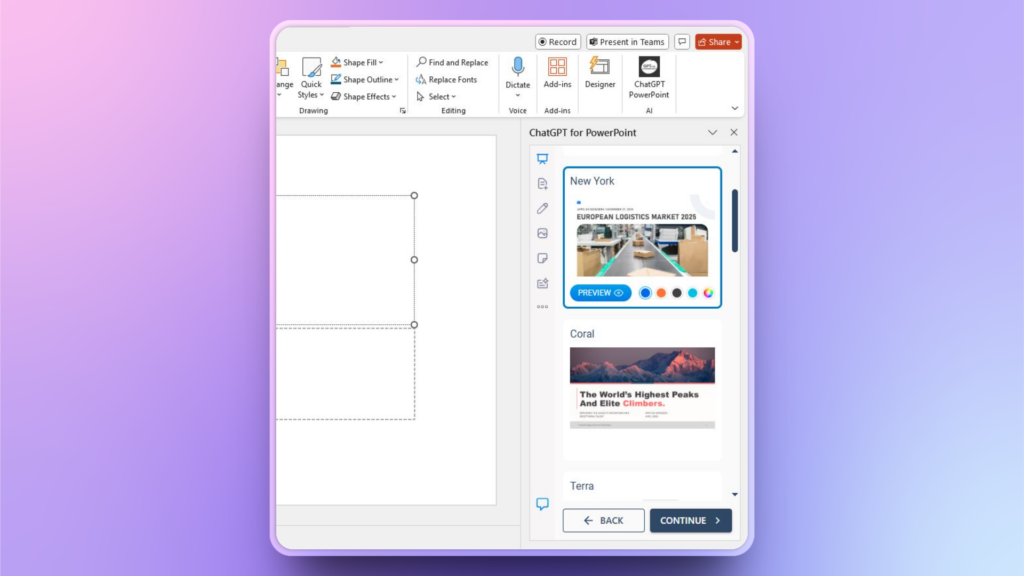
Twistly will generate a possible outline for the slides. Make changes if needed, or continue to the next step, where you need to select the theme for the presentation.
Step 3: Wait and Watch
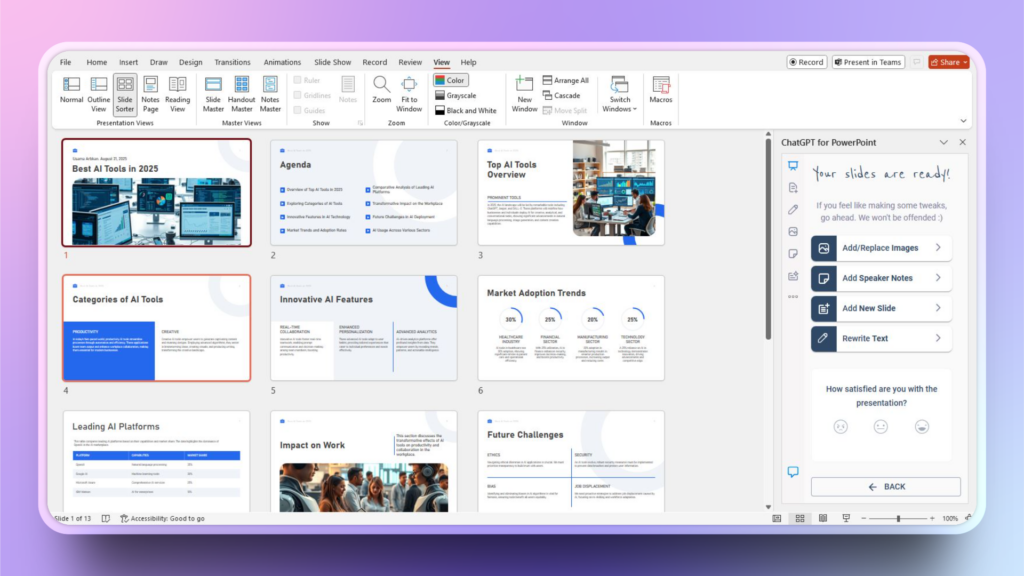
You are all done, and that’s all Twistly needs from you. It will take a few minutes to create slides with images, content, visuals, and optimized formatting.
Your professional presentation is ready so that you can present right away or edit it with AI features of Twistly or native PowerPoint tools.
Conclusion
Follow this guide on how to create a PowerPoint presentation step by step, or make professional slides with Twistly within minutes. For starters and professionals, Twistly is equally useful and efficient.
There is no need to limit your communication skills to boring PowerPoint presentations when Twistly can generate engaging presentations within minutes. Try Twistly now for free for a limited time and upgrade once you are satisfied with the performance.
Start Making AI Presentations in Seconds
Instant Access
Begin exploring Twistly’s full suite of features immediately
No Commitments
No credit card required, and you can cancel anytime
Dedicated Support
Our team is here to assist you every step of the way during your trial.


