How to Add Borders in PowerPoint?
PowerPoint is a powerful presentation software with unlimited customization options. Your slides don’t need to be boring and adding borders can increase the aesthetic appeal of presentation. How to add borders in PowerPoint to make your slide look even better?
There are several options to add borders to slides in PowerPoint, such as adding pictures, solid lines, or shapes as borders to slides. Border design can be generic or match the overall theme of the presentation.
Steps to Add Borders in PowerPoint
The most common type of border is a solid border. Beginners want to keep things simple and quick, and custom solid borders work perfectly with different types of presentations, entertainment, and professional slides.
Method 1: Add Custom Solid Borders to Slides
Solid borders can be added to new slide or the slides in current presentation. Follow these steps to add border design in PowerPoint slides.
Step 1: Open your PowerPoint presentation and go to Insert tab >> Shapes >> pick a shape that you want to add as border to the slide.
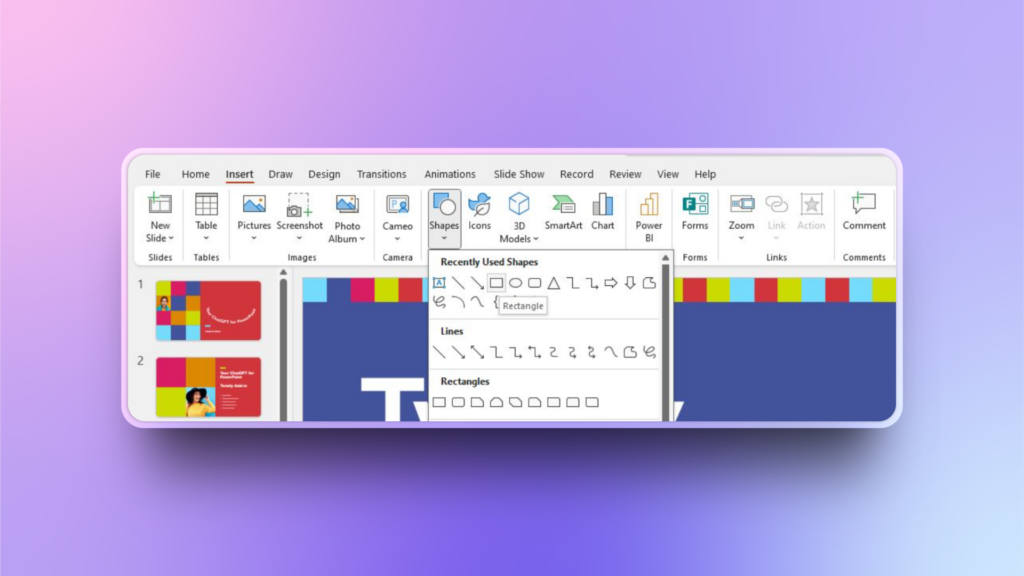
Step 2: Place your mouse at the top left corner of the slide and draw the shape as a border. You can change the size or placement of the border, so don’t worry about precision.
Right click on the drawn shape to see the menu, click Format Shape from the menu or click Format Shape option from the top menu to view the additional settings on the left pane.
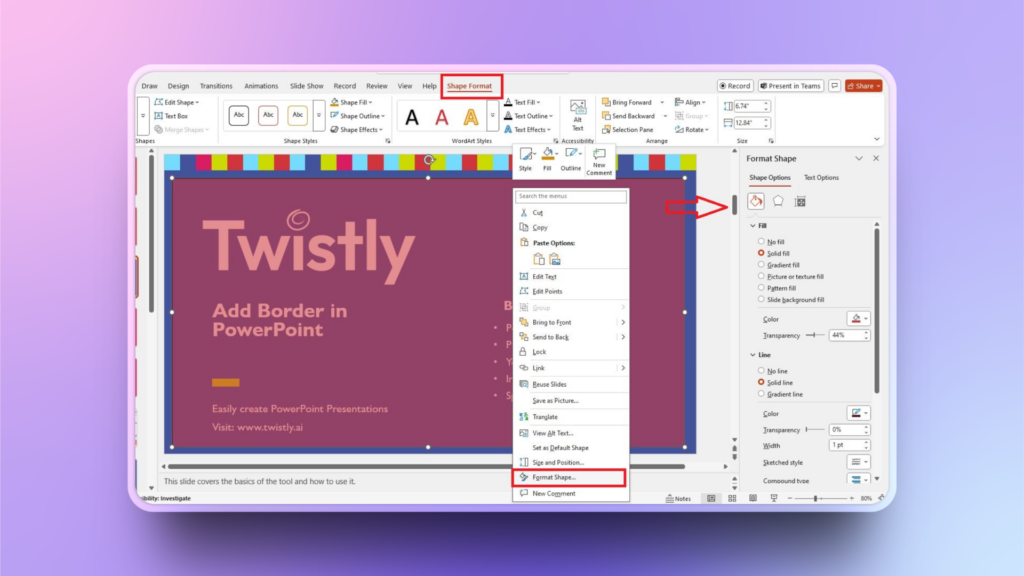
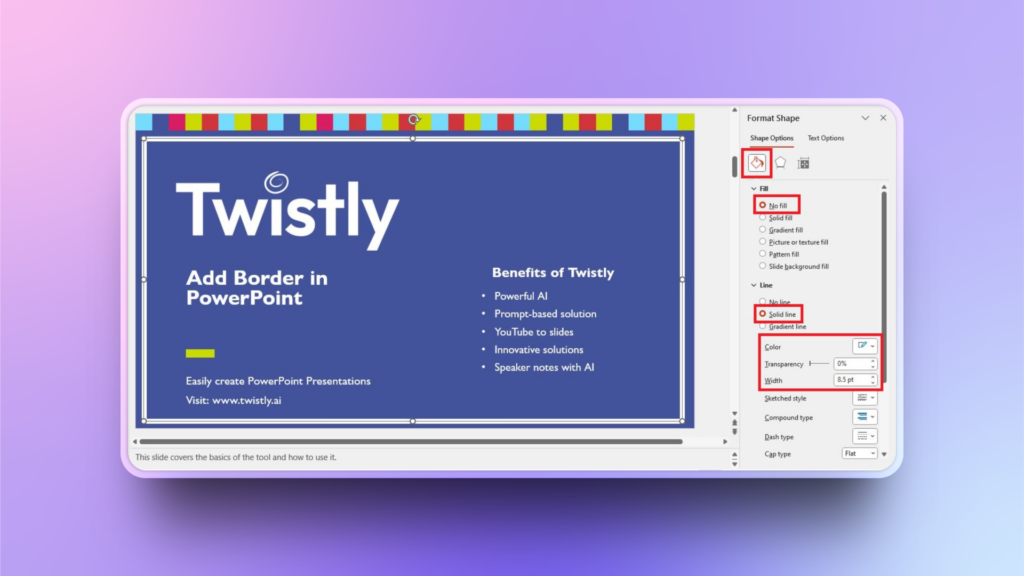
Step 3: In the Format Shape window, select Shape Options >> Fill and Line >> select No Fill >> Select Solid Line >> set color >> adjust width >> make other changes as needed.
The final border should look like this. Depending on the settings, your border may look slightly different.
Step 4: To change the color of the border, go to Shape Format >> Shape Outline >> select the color for the border.
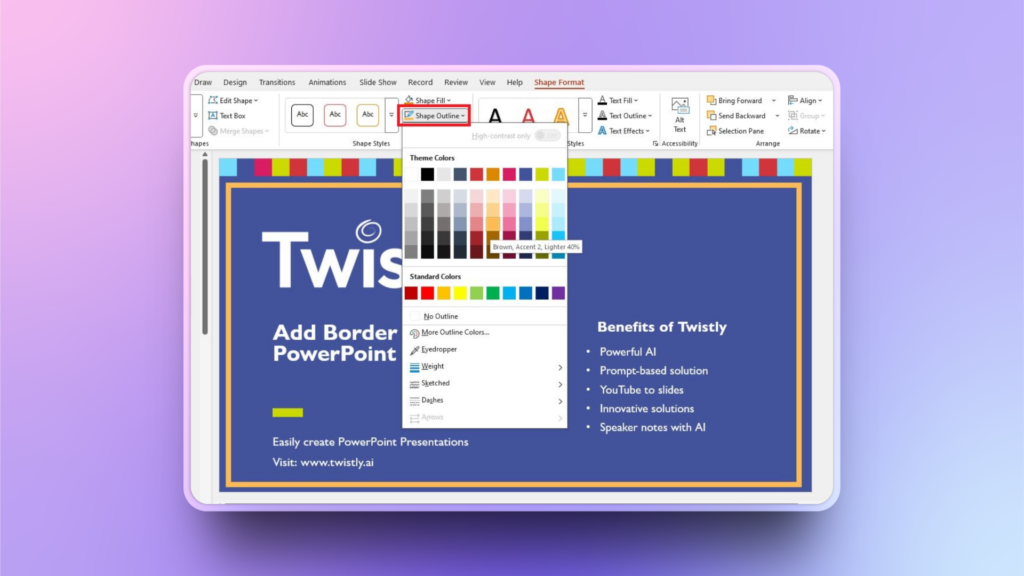
Step 5: Your border for online slide is ready and now copy the border and paste it on other slides. For further customizations, try Shape Effects, sketched styles, dash and other styles of borders.
Method 2: Add a Border to an Image in PowerPoint
The first method described how to add borders in PowerPoint for slides. What if you want to add a border to a single image in the slide? How to add borders to an image in PowerPoint?
The process is pretty simple, like the first method. For the ease of our users, we have described the detailed process on how to add borders in PowerPoint to images.
Step 1: Open your PowerPoint presentation, navigate to the slide with the image, and select the image from your slide. The Picture Format tab will appear in the top menu. We will be using this tab for this method.
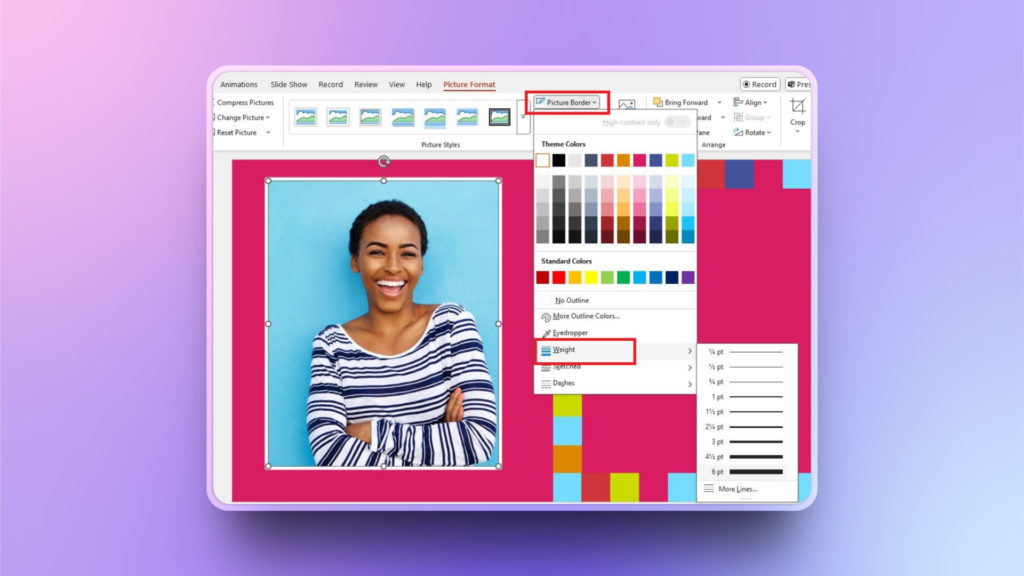
Step 2: Select Picture Border >> select color of the border >> choose weights to adjust the thickness of the border and apply other changes as needed. Basic border for an image in PowerPoint slide should look like this.
Border Designs can be Complicated
You have learned how to add borders in PowerPoint but it is reality that your first border design may not look as cool as online templates. Designing any aspect of the presentation slides takes time and creativity.
After reading these detailed steps, you can get creative with your slides and try new possibilities. Online stores also have readily available borders for the PPT slides. Simply download the border template and easily apply it to the slides.
How to Automate Slide Designing in PowerPoint?
Writing content for the slides, collecting data and information for the presentation is hard but designing and formatting slides is even harder. Teachers, HR teams, instructors and other lots of other users are not good at designing part.
Is there any way to turn available data into appealing slides without going through all these complicated design steps?
Yes, Twistly is an AI add-in for PowerPoint that not only automates designing part but creates an entire presentation from scratch with AI.
What is Twistly?
We understand the struggle of making attractive presentation slides in PowerPoint, it’s wrecking for a common user. Most PowerPoint users don’t have the design knowledge, and they end up with boring slides, even after wasting hours.
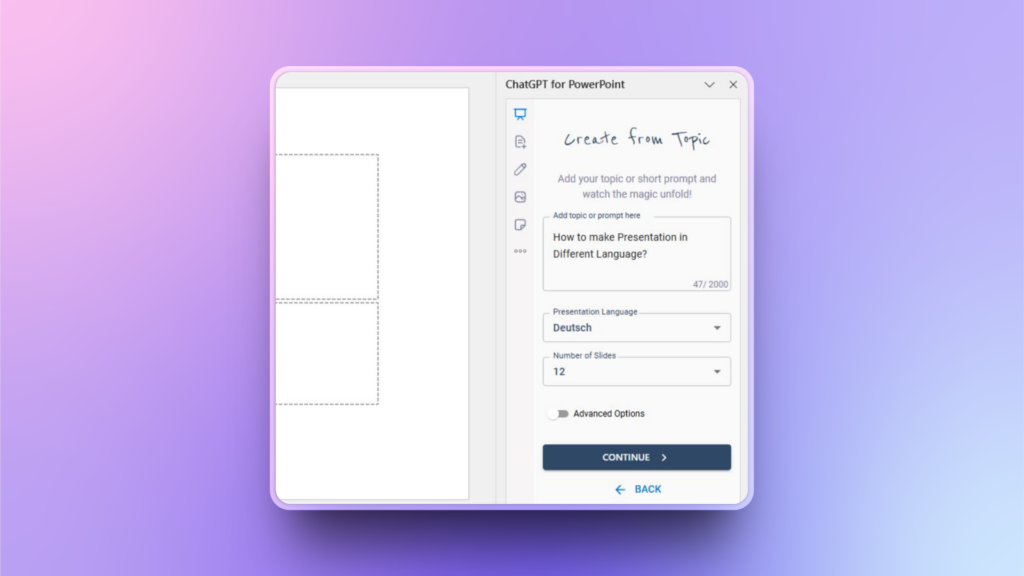
Twistly is an AI add-in for PowerPoint that users can install from the add-in library. This tool works completely inside PowerPoint, so you won’t be switching tabs. Once installed, it integrates ChatGPT into the PowerPoint software.
How to Make PPT Slides with Twistly?
Here is the fun part, making slides with Twistly takes less than a few minutes. When we mention presentation with Twistly, you just need to provide the topic and make some selections about the style, nothing else.
No manual content writing, no need to add images to the slides, no tables or bullet lists, and no slide formatting is required.
Once the topic is provided and the theme is selected, you sit back, and Twistly will give you a ready-to-present presentation within minutes. Make changes at any time and optimize your presentation manually or with the AI features of Twistly. Twistly is Intelligent, swift, and efficient.
Conclusion
Whether you want to add borders to PowerPoint slides or to an image, manual designing takes time, so be patient. Making a professional presentation with PowerPoint can easily take 3-4 hours. Even if you have all the data and visuals available for the slides, the design part is still hard.
Instead of wasting time on manual designing, download Twistly now and supercharge your PowerPoint presentations with AI.
In 2025, only the fast achievers can succeed in any field, and AI can help you win the race with smart work. Free trial version of Twistly is available for new users so be quick and grab your copy now.
Start Making AI Presentations in Seconds
Instant Access
Begin exploring Twistly’s full suite of features immediately
No Commitments
No credit card required, and you can cancel anytime
Dedicated Support
Our team is here to assist you every step of the way during your trial.


