How to Add a Text Box in PowerPoint?
In PowerPoint, you cannot randomly type text anywhere on the slide. There is a dedicated box for the text that can be resized, moved, deleted, or edited. Do you know how to add a text box in PowerPoint and how to manipulate it as per your requirements?
These text boxes seem like a pretty common feature, but effective use of these small features makes your PowerPoint presentation more attractive. Within the text box, you can add different headings, bullet points, plain text, or any other type of text-based content.
Adding a Text Box in PowerPoint
Almost every presentation you see has some sort of text. A text box may not be visible due to a transparent border, but it is always there. It is one of the most useful features of PowerPoint presentations and also the easiest one.
Steps to Add a Text Box in PowerPoint
The process of adding a text box in a new or existing PowerPoint presentation is the same. How do you edit a text box and copy, move, or resize it? All these questions will also be answered later in this post. Let’s see how to add a text box to any slide.
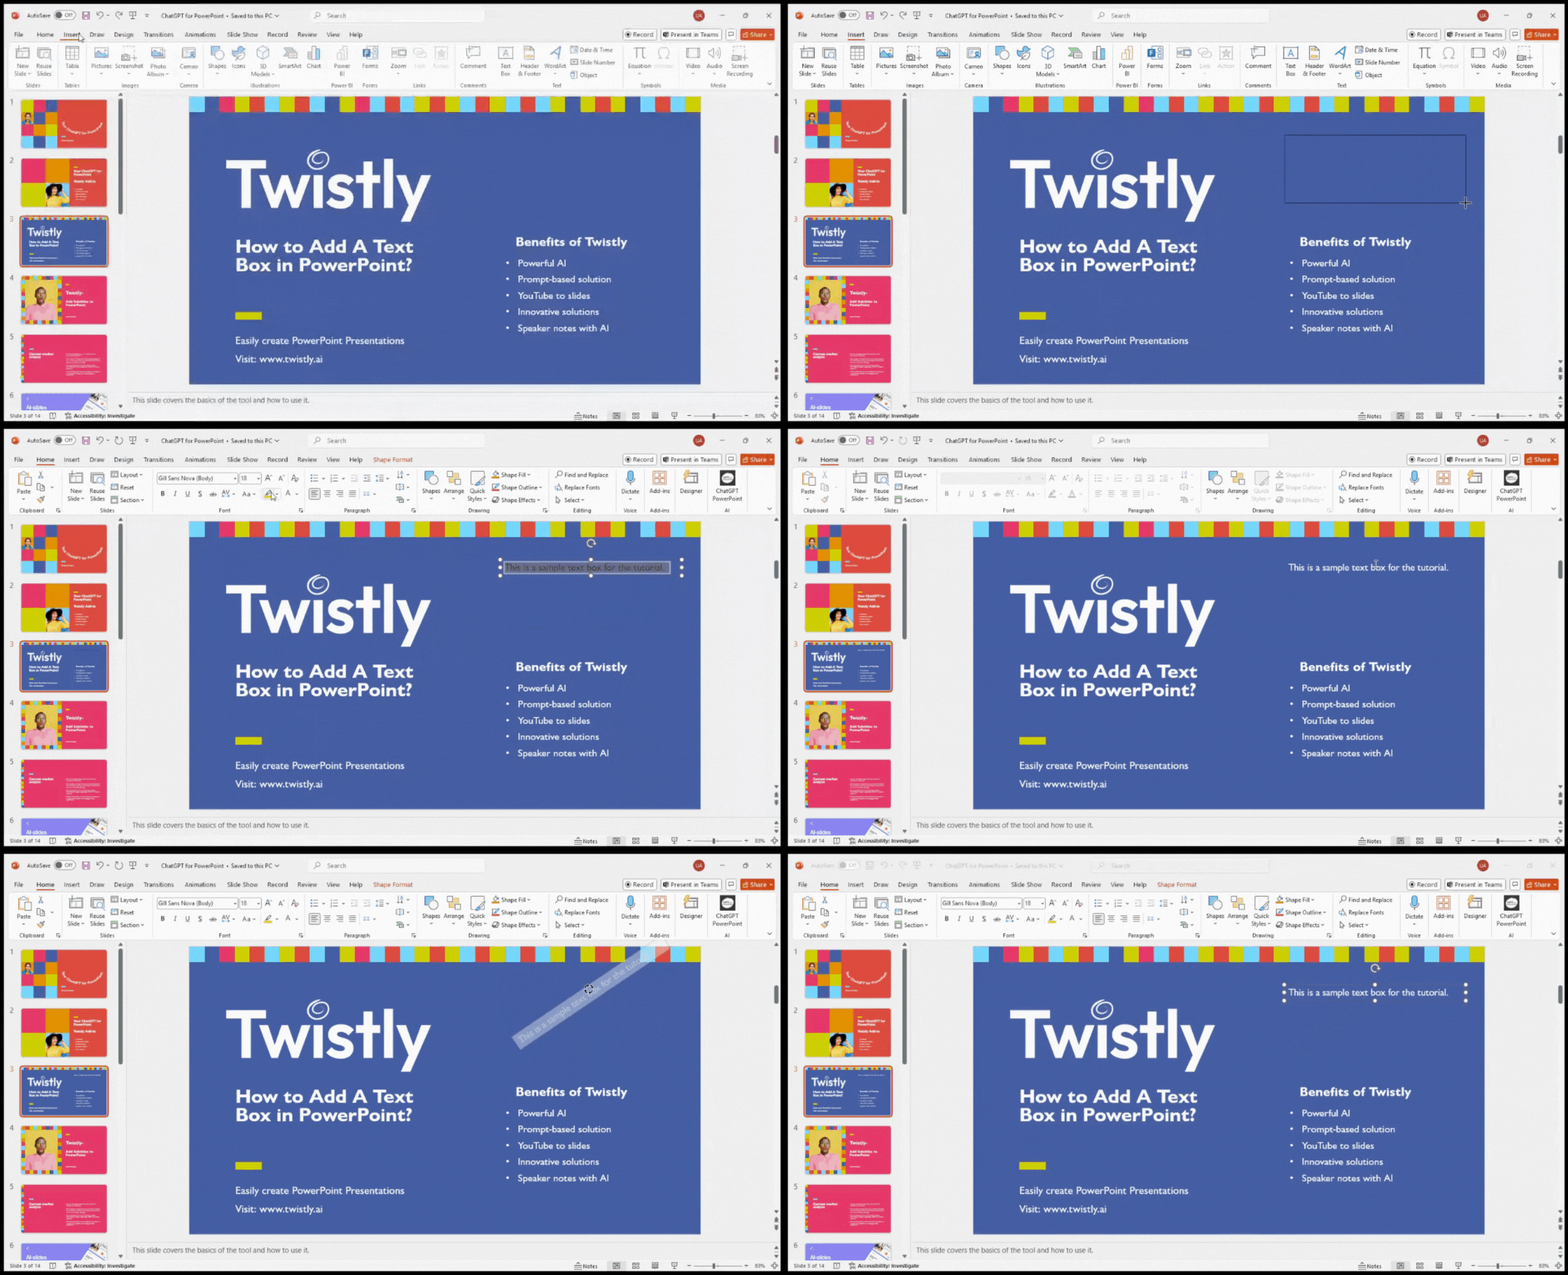
Step 1: Open your PowerPoint presentation and choose the slide where you want to add the text box. Then, go to the Inert tab and navigate to the Text Box button in the Text section.

Step 2: When you click on the Text Box button, the cursor will turn into a crosshair. Go to the slide area where you want to place the text box. Draw the text box on the slide, keeping the width and height as per your requirements.
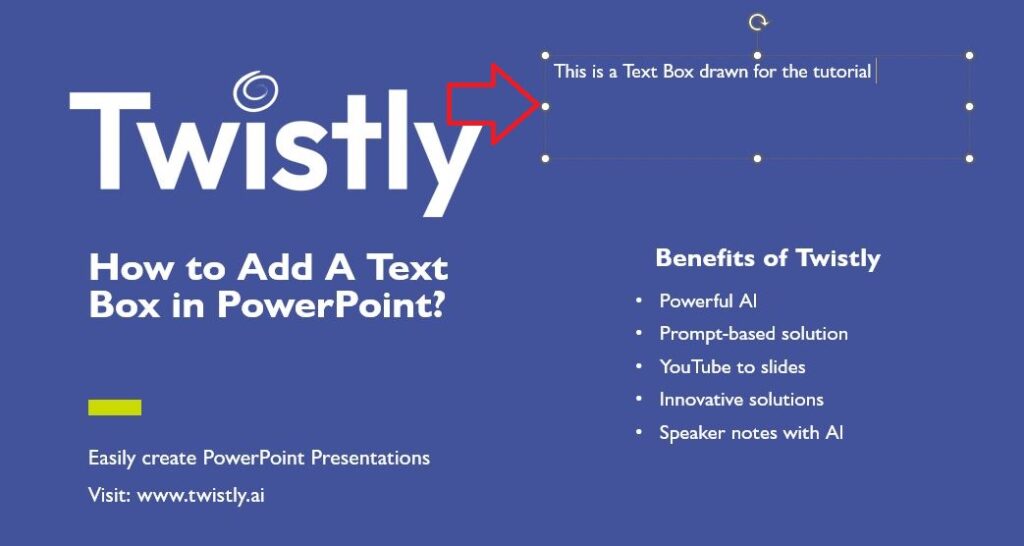
Step 3: Type your text or data in the box. Then, using controls on all sides of the box, you can resize the text box and change its orientation.
Copy a Text Box
Instead of adding a new text box to every slide, you can add a text box and copy it for other slides. The dimensions, size, and other properties of the text box will remain the same. This approach is easier when you need to add the same type of text boxes to different slides of the presentation.
- Click on the borders of the text box, right-click on the mouse, or press CTRL+C to copy the text box.
- Now, go to the slide or place where you want to paste the text box and press CTRL+V, or use the right-click to open the menu and then choose the paste option.
When you select the text box, make sure to click on the borders to copy the entire box with text. If you click inside the box, only the text will be copied. Just be careful about selecting the borders only.
Delete a Text Box
Once a text box is added, you may no longer need it. Deleting a text box or any other element in the slides is easy. You just need to select the borders of the box and press the Delete button. The text box and the text will be removed from the slide.
Click inside the text box and select the text if you want to keep the box but delete only the text.
How to Enter the Same Text Box on All Slides?
You might want to use the same text box in all PowerPoint presentation slides. Instead of adding a text box to every slide, simply use the Slide Master view and add the text box to the master slide.
Adding the same text box to all slides in a presentation is easy; follow the given steps.
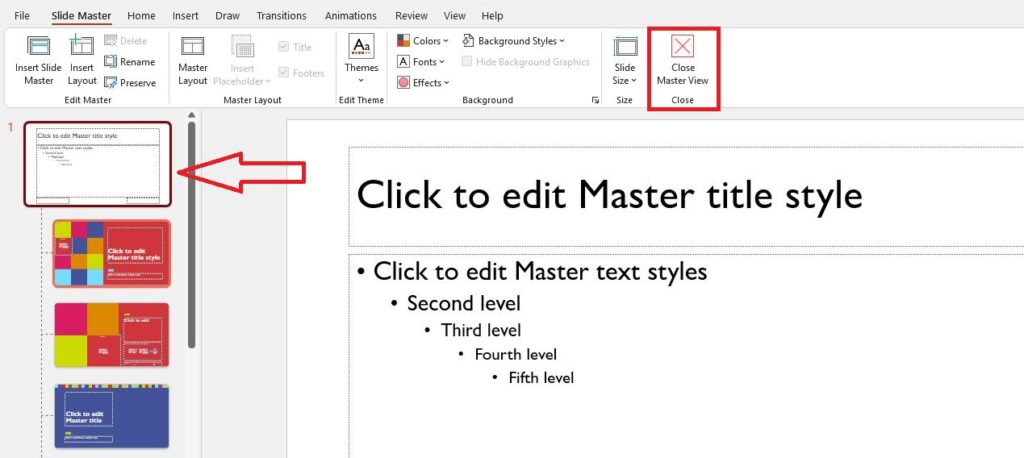
Step 1: Open your PowerPoint presentation, go to the View tab, and click the Slide Master option.

Step 2: Navigate to the very first slide and add a text box with the text from the master slide. Resize or edit the box, then click the Closer Master View button. All slides in the presentation will have the same box with text.
Skip Editing, Design Slides with AI
Every feature of PowerPoint adds aesthetic or visual appeal to the presentation. The only thing about this approach is manual editing. Not everyone understands the PowerPoint features and how to use them.
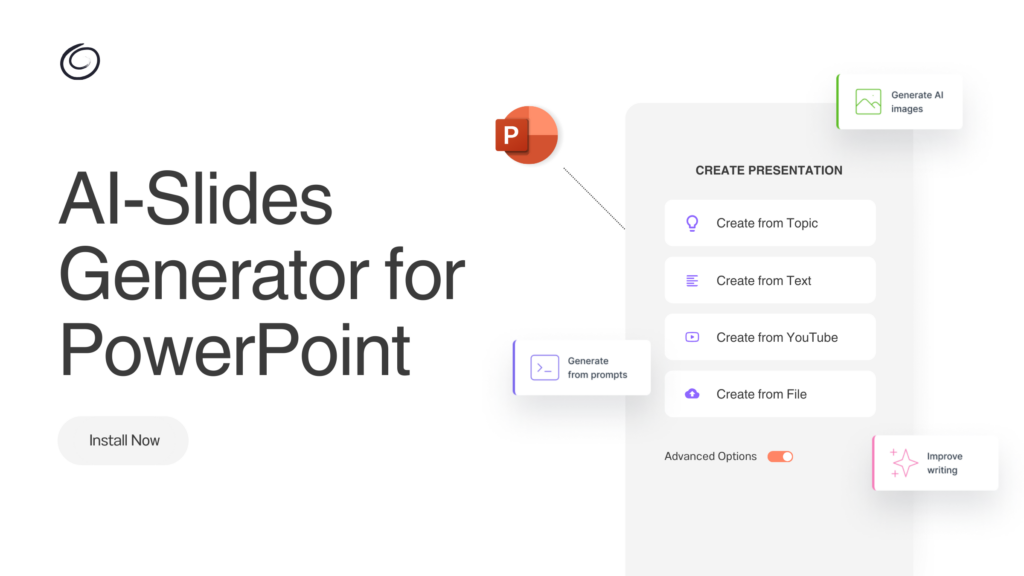
With AI presentation makers like Twistly add-in for PowerPoint, you can skip all these manual edits. It seamlessly integrates with PowerPoint and allows for making presentations with only one click. All you need to do is:
- Enter the topic of the presentation
- Create a complete presentation from the text or article
- Turn a YouTube video from a link to a presentation
- Upload any PDF, Word, or Text file to turn information into slides
No More Text Box Editing with Twistly
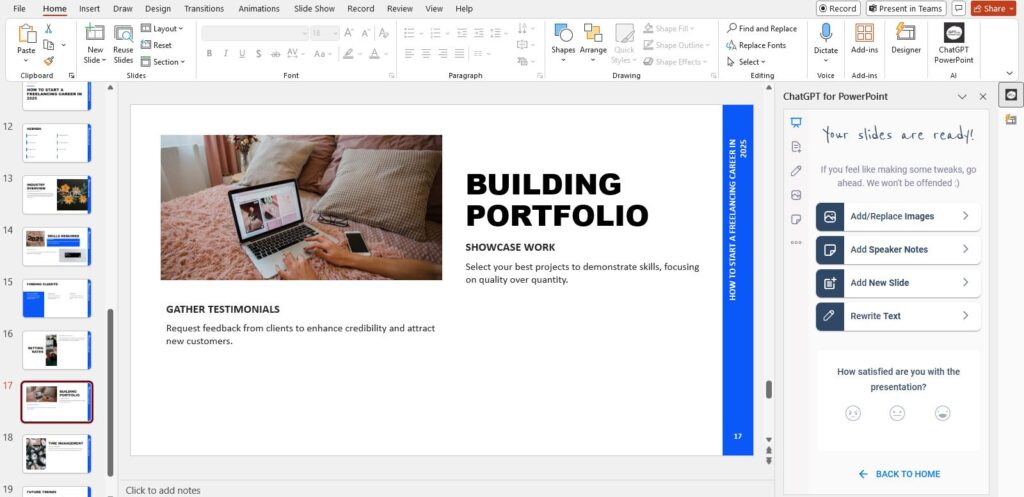
Instead of adding, deleting, and resizing text boxes in the slides, let the advanced features of Twistly do the magic for your slides. Once you have entered the topic, select the number of slides and the template, and your powerful presentation will be ready within a few moments.
Download Twistly for PowerPoint
Do you want to try Twistly for free without any commitment? Download Twistly for free now. Once you have realized how much time you can save with these AI PowerPoint templates in the tool, you can upgrade to the premium version.
Complete AI Presentation Making Solution.
Twistly Add-in can turn a Topic, YT Video or File into a professional presentation— Get Add-in Microsoft AppSource for free today.
Try for free
Final Words
Go to the Insert tab, choose the text box, and draw the box on the slide. This is the simplest way to add a text box in PowerPoint. The next part is editing, styling, and manipulating the text box according to your requirements.
AI can save you hours of manual work and create stunning slides within minutes. Twistly is advanced, and you have not experienced it before. Boost your communication game with AI for PowerPoint.
Frequently asked questions
Start Making AI Presentations in Seconds
Instant Access
Begin exploring Twistly’s full suite of features immediately
No Commitments
No credit card required, and you can cancel anytime
Dedicated Support
Our team is here to assist you every step of the way during your trial.


